Mortal Shell 2 features a host of viciously creative bosses, many of whom sport nausea-inducing appendages sticking out from the wrong places and screen-filling attacks designed to tear your Harbinger to shreds. And while there are technically only a handful of main bosses that guard the Corrupted Gates that must be cleansed to advance the story, plenty of minibosses stand between you and the Ovum of the UnderMether.
In this guide, we're covering each of these grotesque opponents. This is our comprehensive list of all 45 bosses in Mortal Shell 2, from the Tar Golem that wrecks your best buddy Harros at the start of the game, to the H. R. Giger-inspired Hexapod that Proxima is hunting. Suit up in your favourite Shell, sharpen your blade of choice, and get the Naylshotte ready to blast some skulls!
To see this content please enable targeting cookies.
All bosses in Mortal Shell 2
Use our handy checklist below to mark off each boss as you beat them.
Follow our walkthrough for tips on reaching and beating each bossAn extra tip from Jeremy
If you aren't following it already, bookmark our Mortal Shell 2 walkthrough, which is packed to the brim with Ollie's strategies for how to locate all bosses, as well as the most efficient way through the game. I'll detail the closest Beacon and the general location for each boss below, as well as how to defeat them, but our hyper-detailed walkthrough is your best bet if you need more intel.
1. Gloombound Ritualist
Be careful of the minions here; their erratic movements and explosions are more dangerous than the Gloombound Ritualist. | Image credit: Rock Paper Shotgun/Playstack
Closest Beacon: Village Outskirts Beacon
Location: The Gloombound Ritualist is impossible to miss, as it's the first boss faced during the Prologue. Keep moving beyond the bridges and cliff walls that extend from the Village Outskirts Beacon, and you'll eventually find a boss arena that you can drop down into.
While not a terribly hard starting boss, the Gloombound Ritualist calls forth minions who will explode in bloody bursts. Dodge out of the way as soon as they move towards you, or else you'll suffer massive damage with each hit. Once the Gloombound Ritualist takes a break from this summoning, get in close and whack away. This is a good chance to practise your Perfect Guards and Harros' Stone Stun; a few Naylshotte shots will also do the trick.
Mark boss as defeated.
2. Tainted Vestige
Don't worry, you'll soon be destroying Tainted Vestiges left and right once they become normal enemies, which are called Tarred Vestiges. | Image credit: Rock Paper Shotgun/Playstack
Closest Beacon: Disciple's Grotto Beacon
Location: From the Disciple's Grotto Beacon, turn to your left and you'll spot an exit that leads out from the cave into a grove with the Tainted Vestige.
The Tainted Vestige is a much heftier enemy than the Gloombound Ritualist, and is a challenge during this early part of Mortal Shell 2. It typically starts the fight by burrowing its arms into the earth and shooting two sets of underground spikes at you, so be ready to dodge. All of its melee attacks are easy, well-telegraphed fodder for Perfect Guards, but watch out for its unblockable grab. If it catches you, it'll stuff you into its maw and chomp you to bits.
Mark boss as defeated.
3. Tar Golem
If you want to repeat this fight for achievement purposes, you'll need to Alt + F4 right before the Tar Golem kills you. | Image credit: Rock Paper Shotgun/Playstack
Closest Beacon: Disciple's Grotto Beacon
Location: Go down the slope from the Disciple's Grotto Beacon, and a huge armoured foe will attack you. He's aggressive but beatable as long as you guard well; once he's dead, use the air current nearby to hop to an upward platform. Follow this path until you run into Ruk again and a massive Bone Gate, which leads to the boss room.
The Tar Golem is one tough opponent fitting for the end of the Prologue. But guess what - this is one of those Soulslike bosses that you aren't technically supposed to beat. You will get an achievement if you manage to deplete the Tar Golem's health bar though, so it's worth a try.
Focus on dodging to the Golem's side and getting several hits in whenever it sticks its axes in the ground and comes at you. You cannot guard its blows whenever it raises both axes into the air or jumps. You can, however, guard any attacks that the Tar Golem makes with a single axe, along with its occasional kick.
Whether you win or lose the fight, the outcome is the same - a cutscene will play, and your valiant Shell comrade Harros will give up his quasi-living state so that you can keep moving forward. What a bro.
Mark boss as defeated.
4. Great Arbiter of Flesh
The Great Arbiter of Flesh has a nasty grab that will make short work of your Shell. And it's unblockable - you can see by the screenshot here, Tiel's hardened condition is doing nothing. | Image credit: Rock Paper Shotgun/Playstack
Closest Beacon: Widow's Overlook Beacon
Location: Turn south of the Widow's Overlook Beacon and travel down the slope in the direction of Mushroom Village to the east. The Great Arbiter of Flesh is meandering around a dirt clearing.
If you haven't unlocked either Tiel or Proxima as your starting Shell, the Great Arbiter of Flesh will be very challenging. Even with a Shell, he's still no joke, but he does serve as an excellent test for learning how to time your parries, guards, or hardens.
Be aware of his feint, where he appears to strike in one direction, and then suddenly twists and hits from the other way. His grab is also a nasty unblockable attack where he'll capture your Shell by the throat, toss you into the air, and impale you on his blade.
Mark boss as defeated.
5. Vrannic, the Grand Illusionist
Vrannic's a pest when he starts summoning copies. Dispatching them and avoiding projectiles will be your biggest worries in this battle. | Image credit: Rock Paper Shotgun/Playstack
Closest Beacon: Mushroom Village Gate Beacon
Location: Vrannic is the boss of the Hall of Illusions, a tricky dungeon that's unlocked after you choose to Cleanse the Mushroom Village Gate Beacon. Check out our walkthrough for tips on reaching him.
Vrannic is not particularly taxing at first, as long as you dodge his projectiles and avoid his unblockable staff strike. Halfway through the fight, however, he vanishes and starts creating copies of himself, and projectiles are likely to fill your screen as they all fire at you. This gets awfully chaotic, but each copy goes down with a single hit, so kill them as quickly as possible, preferably with melee strikes.
Once all the copies are dead, regular Vrannic reappears. If you managed to destroy all of his doppelgangers with melee attacks, you should have enough Resolve to blast him apart with your sidearm, which is how I ended the fight.
Mark boss as defeated.
6. Circle of the Grasping Root
Not a hard boss, especially if you've got Tiel or the Lute. Make these frog folk fight amongst themselves! | Image credit: Rock Paper Shotgun/Playstack
Closest Beacon: Sleeping Mire Beacon
Location: The Sleeping Mire Beacon is found within the Sunken Village, which can be accessed after going through the Corrupted Gate in eastern Mushroom Village. If you choose to Cleanse this Beacon, you'll be taken to Rootwater Hollow, a small, swampy arena that leads directly to this fight.
The Circle of the Grasping Root is composed of one large Frog Mama and three poison-tossing cultists, so it's basically just a fight against a small mob. If you're rocking a poison-focused build as Tiel, this fight will be a walk in the park, considering that our bone-faced Thief friend can heal from poison damage if you invest in the right skill points. You can also use the Troubadour's Lute to have the cultists all fight each other for you, which is great fun.
Mark boss as defeated.
7. The Wandering Shepherd
What an amusing battle. Looks like lamb's on the menu tonight! | Image credit: Rock Paper Shotgun/Playstack
Closest Beacon: Sunken Village Beacon
Location: Continue past the Sunken Village Beacon across the bridge, which leads to a fenced enclosure. There are several sheep grazing here, and you'll hear the Wandering Shepherd playing his panpipes.
Run up to the Wandering Shepherd and slice at him immediately. After getting in a hit or two, he'll teleport away, and all of the sheep turn evil! From here on out, it's a war of attrition as you chase after the infuriatingly fast Shepherd, all while dealing with lumbering devil sheep.
If you obtained the Sheephead Totem from the Grisha Pup in Mushroom Village, you may have some idea of how sheep attack in this game. Their moves can be parried, and if you manage to get perfect timing, your Shell will hilariously grab 'em by the hooves and gut 'em. They have a surprising amount of health, however, so try to focus your attacks on the Shepherd.
Once the Shepherd's health is halfway gone, he turns into the Satan-esque Tarblighted Shepherd and will transform you into a sheep as well. Once again, if you picked up the Sheephead Totem, you may be familiar with this form. You can still beat the crap out of him as a sheep until you turn back to your true self.
Mark boss as defeated.
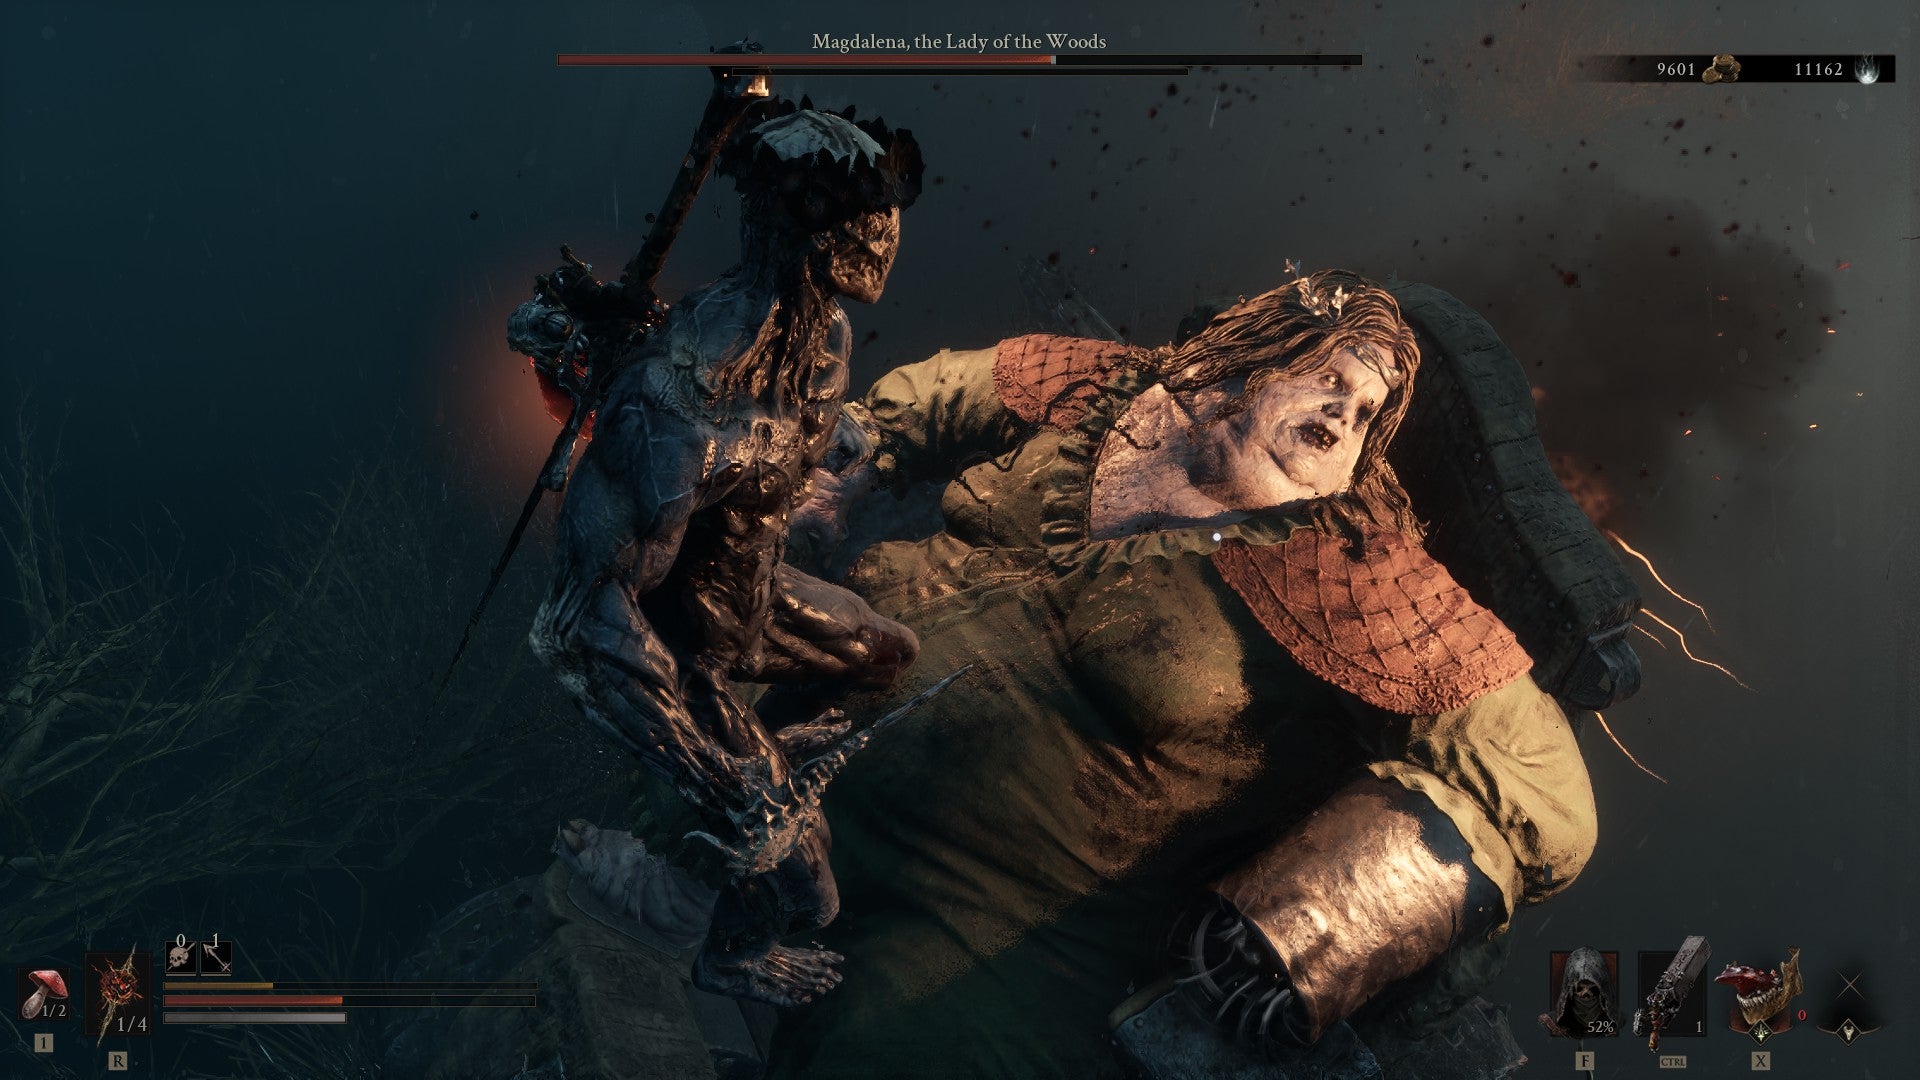
8. Magdalena, the Lady of the Woods
This'll teach you to stop driving like a Twisted Metal character, Magdalena! | Image credit: Rock Paper Shotgun/Playstack
Closest Beacon: Sunken Village Beacon
Location: After defeating the Wandering Shepherd, squeeze through the crack in the fence in the back of the arena and keep moving forward until you encounter Ruk, who alerts you to Magdalena's presence up ahead.
The Lady of the Woods is here...and she's in a rocket-powered mobility scooter! Hell yeah. This is an entertaining, chaotic fight, and you can summon the Shell Smert to assist if you like. Smert won't be that much help, though, especially as Magdalena proceeds to drive through the arena, unleashing hell in her wake and doing fiery donuts in her vehicle.
Opportunities to attack Magdalena can be rare at first, as she keeps rampaging your way and forcing you to dodge. Try to keep to her side to avoid the flames that shoot from her scooter's back, and notice that she always does two donut rotations. When she's done, get in there and hit her a few times before she revs up again. Her scooter will also occasionally get stuck - keep an eye on her animations, and if you're far from her when this occurs, use your sidearm.
Inflict enough damage, and you'll be able to do two powerful Ripostes against Magdalena during this fight, hopping atop her for several quick stabs. Eventually she'll also start summoning mutated Tar Babies to chase after you. These things only take a hit or two to destroy, and they're annoying. Try to dispatch all of them as a means of generating Resolve before refocusing your attention on Magdalena.
Mark boss as defeated.
9. Broodshell Swarm
Defeat the wriggling Leechtongues first; the Bell Snail is slow and easy to attack in comparison. | Image credit: Rock Paper Shotgun/Playstack
Closest Beacon: Blackridge Pass Beacon
Location: Enter the Blackridge Cliffs and go past the cultists fighting the Tarred Vestige. Veer north into the area with the Infested Stalker (the white spider-like creature), then turn east through the next region, where more Infested Stalkers abound. Pass through the archway, and you'll get to a graveyard entitled Stones of Remembrance. Head north-east until you reach a watery clearing full of snails; the Broodshell Swarm is in an enclave here.
The Broodshell Swarm is a collection of three enemies - two Leechtongues and one Bell Snail. They're hardy foes during this stretch of the game, but not unmanageable. Take the Leechtongues out first, as they have an unblockable lunging attack. As long as you can avoid this, they'll be vulnerable for a time with their heads buried in the dirt. When they're dead, focus on the Bell Snail, who is easy aside from occasionally hiding in its shell. Get in close and hit away.
Mark boss as defeated.
10. Grisha
Grisha are arguably the most common, recognisable enemies of the Mortal Shell games, and while it's possible to encounter them in the wild prior to this, the Flooded Village's Grisha is one particularly mean asshole. | Image credit: Rock Paper Shotgun/Playstack
Closest Beacon: Blackridge Pass Beacon
Location: Cross the rope bridges south of Blackridge Pass Beacon until you get to an area with an archway and several cultists guarding it. Take them out, break the wood on the archway, and peer through it to manifest an opening into a nearby stone structure. This leads to the Flooded Village Dungeon, which is full of sunken houses and some tough foes. The Grisha lurks in an arena-sized space in the east of this dungeon.
The Flooded Village Grisha is definitely a hardy rat-faced opponent, but this is a good chance to time your parries, guards, or hardens against its blade arm swipes. The goal here is to inflict Break damage and stagger the beast to make it fall onto its back, and a hefty weapon like the Battle Axe works wonders. There's one unblockable attack to watch out for, telegraphed by the Grisha roaring and then thrusting its bladed arm upwards in a spin.
There's an air current in this room, and you can ride it to the platform upwards to get some cheap shots on the Grisha with your sidearm. But don't rely on this, since your Resolve will eventually wear off.
Mark boss as defeated.
11. Lucian, the Thirsting Knight
Lucian's easy at first, but the second stage of this fight is annoying due to his invisibility. Stay aggressive - once you manage to latch onto him, he won't be able to escape you. | Image credit: Rock Paper Shotgun/Playstack
Closest Beacon: Stonebled Gate Beacon
Location: Lucian is the last boss of the Hidden Keep, the dungeon that opens when you Cleanse the Stonebled Gate Beacon. Progress through the dungeon and he'll attack you on a ruined bridge after you fight two heavily armoured knights.
Lucian is a lizard-like vampire boss who hits with swift scimitar strikes. They hurt, but can be blocked or dodged with some trial and error. As you knock him about, his helmet will fall off and he'll grow redder and redder before disappearing into a cloud of bats.
Explore the remainder of the dungeon until you reach the final room where the Ovum lies. Lucian will attack you once again, and this time he's invisible, which makes parrying his moves much harder. I hardened to endure the brunt of his strikes and then got a Battle Axe swipe in, after which he stayed visible. Beware his jumping kick, keep performing combos to stagger him and prevent his invisibility, and the fight will be yours.
Mark boss as defeated.
12. Tarblighted Stoner
Yikes, that's a big ol' piece of rock coming right for my head. | Image credit: Rock Paper Shotgun/Playstack
Closest Beacon: Sanguine Shoreline Beacon
Location: From the Sanguine Shoreline Beacon (the second Beacon in the Sanguine Caverns), simply pass through the transporter in front of you to be taken to a cave entrance where the Tarblighted Stoner lurks.
The Tarblighted Stoner's one of those big rock-chucking brutes who you may have already encountered in the overworld, except on fire. Smack him repeatedly with your Battle Axe or a similar weapon to build up Break damage, and stay clear of the boulders that he picks up. He'll often attack three or four times in a row with the boulder before tossing it at you. Sometimes he'll go for two boulder tosses; either way, these throws are unblockable.
Mark boss as defeated.
13. The Lost Child
Proxima gives the Lost Child a much-needed dental check-up. | Image credit: Rock Paper Shotgun/Playstack
Closest Beacon: Sanguine Shoreline Beacon
Location: After defeating the Tarblighted Stoner, move into the cavern and ride an air current to a higher level. You'll run into Ruk, who tells you about the Lost Child up ahead.
Eww, what a grotesque fella. The Lost Child is a putrid slug-like mass of flesh who barfs out a stream of acid, slurps you into his gut, and poops you out with much gusto. He's a truly wild boss, and even though you can summon Eredrim as help, don't expect your companion to last very long against the monstrosity.
The Forgotten Crossbow came in very handy during my fight. I infused it with Burn (via the Emberseed Stone) and fired non-stop barrages on the Lost Child from above with the Barrage Stone. These combined with some heavy attack Battle Axe combos took a good chunk out of his health, letting me get my Ripostes in.
If you're not a Crossbow fan, you can still do plenty of damage as long as you steer clear of the streams that the Lost Child fires from his mouth, as well as his arm swipes, one of which is unblockable. The Lost Child will also occasionally breathe in everything around him, and this move's another one that can't be blocked. Dodge out of the way, lest you get swallowed up and become yet another corpse in the gross arena.
Mark boss as defeated.
14. Bloodcursed Lithopod
The Harbinger's gonna enjoy some crab legs back at the Marrow Keep when this is over. | Image credit: Rock Paper Shotgun/Playstack
Closest Beacon: Gloomshade Grove Beacon
Location: From Gloomshade Grove Beacon in western Fainweald, turn around into the clearing with the Grisha Hunters, and then turn right towards the Tainted Vestige. Go past it and you'll be in a rocky, mountainous region with lots of little Lithopods. Keep heading south to find a Bone Gate teleporter; hop through it and you'll land in a watery area. An axe-wielding foe will jump at you; once he's done, explore the area and the Bloodcursed Lithopod will appear soon enough.
This is a giant version of the little crab-like Lithopods you've faced thus far, and despite its size, isn't much harder. Slam into the rock atop its back with heavy attacks and you'll end it soon enough. As its name might suggest, the Bloodcursed Lithopod can hit you with the Bloodcurse status and make your health steadily drop, so be careful if you're parrying its blows.
Mark boss as defeated.
15. Rabid Grisha Pack
Dance for me, my mutated rat beasts! Dance to the strums of my Lute! | Image credit: Rock Paper Shotgun/Playstack
Closest Beacon: Gloomshade Grove Beacon
Location: Head through the Grisha Hunter clearing behind the Gloomshade Grove Beacon, then turn left until you reach the outskirts of the Citadel of Penance. There are some low-level brigands working amongst gravestones here and a well. Enter the well to find yourself in the Holding Cells. To reach the cage containing the Rabid Grisha Pack, you must unlock the door at the lowest watery level of the Holding Cells with the Feeding Room Key. This can be found in a ramshackle structure not too far from the door.
One Grisha's bad enough, but two of 'em? Hell no! The tight confines of this battle will also do you no favours, so make things easy on yourself by confusing both of these hairy bastards with the Troubadour's Lute. Blast them with music a few times, and then sit back and watch as they beat each other up. Then, pick off whichever Grisha remains.
Mark boss as defeated.
16. The Warden
Time to avenge Eredrim! Unfortunately, this is a very crowded battlefield, and the Warden jumps around like a rabid demon on steroids. | Image credit: Rock Paper Shotgun/Playstack
Closest Beacon: Citadel of Penance Beacon
Location: Our guide to unlocking Eredrim contains the full details, but in brief, move into the citadel's courtyard from the Beacon and drop down into the pit to reach the lower dungeon level. This is a circular area; explore it until you find a lift controlled by a lever. Ride it up and walk forwards, and the Warden fight will begin.
The Warden is a pain, and fighting him in this cramped arena makes dodging his blows - almost all of which are unblockable - very hard. His most troublesome move comes when he spins four times in rapid succession, flinging his axe down with each rotation. After the fourth blow, you have a quick moment to get in attacks of your own.
You may want to use a Tarstone that can apply Burn or Poison to your weapon to inflict damage over time, seeing as how he's got a huge flaming axe. I also managed to make the fight easier by interrupting his attacks with summonable Grisha spirits (you'll get these by equipping the Grisha Remnant, which is obtained as a drop from the various Grisha bosses listed in this guide) and by flinging my Battle Axe at him (via the Infused Stone).
Mark boss as defeated.
17. Vrago, Solikar Champion
Another beefy bruiser who requires dodging. | Image credit: Rock Paper Shotgun/Playstack
Closest Beacon: Nochtean Gate Beacon
Location: Vrago is the boss that appears at the end of the Abandoned Shrine, the dungeon unlocked when you Cleanse the Nochtean Gate Beacon in south-west Fainweald.
Vrago attacks with a wheel that looks like a makeshift chakram of some sort, but he mostly just uses it to slam you with unblockable jumps. The strategies described above for the Warden also work nicely here - interrupt him with heavy strikes and other tools like the Grisha Remnant, and do not overcommit to your attacks. Vrago's most vulnerable when he's just landed on the ground after a jump.
Mark boss as defeated.
18. Gloombound Legion
Barely a boss, really. More like another excuse to watch fools dance to the sound of my strings! | Image credit: Rock Paper Shotgun/Playstack
Closest Beacon: Hangman's Scaffold Beacon
Location: You'll face the Gloombound Legion almost immediately after you Cleanse the Hangman's Scaffold Beacon and enter the Gloomstricken Garrison.
This "legion" is really just a small mob of gangly Gloom Seekers and Foul Knights, none of which would be tough on their own. They're a little more deadly in a group, but by now you should know how to handle a mob in this game - Lute 'em to death! Not hard at all.
Mark boss as defeated.
19. Tishina's Confessor
Think of Tishina's Confessor as a preview of the tactics you need to use to defeat the next boss. | Image credit: Rock Paper Shotgun/Playstack
Closest Beacon: Executioner's Pulpit Beacon
Location: After unlocking Executioner's Pulpit Beacon within the Prisoner's Way mini-dungeon, simply step through the Bone Gate teleporter and you'll be taken to a tower to fight Tishina's Confessor.
Tishina's Confessor has a large sickle that is extremely painful when it connects, but all of his attacks are at least clearly telegraphed, and none are unblockable. Parry away, or stagger him with a well-timed Perfect Guard or Perfect Harden. Ranged sidearm strikes will also soften him up and allow you to keep some distance between yourself and that sickle.
Mark boss as defeated.
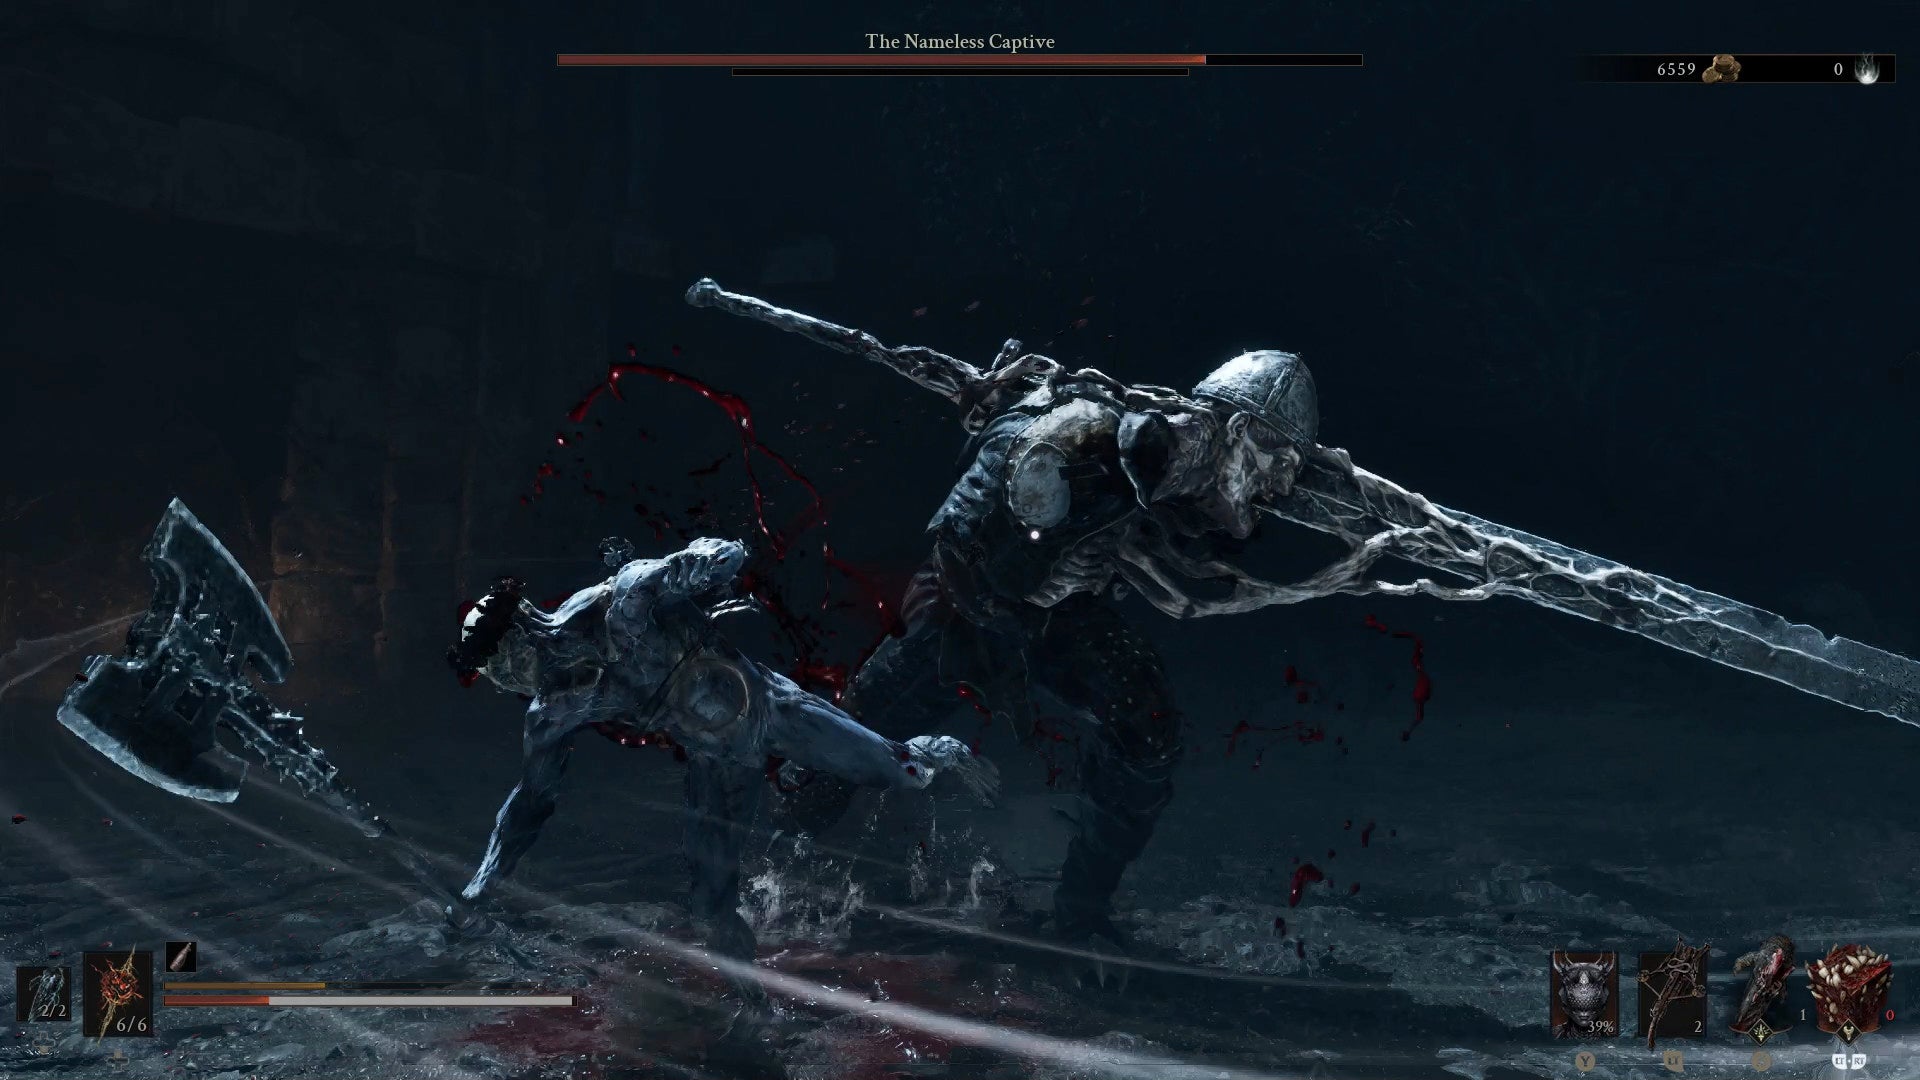
20. The Nameless Captive
Let me know if you manage to get the Achievement for parrying all of the Nameless Captive's attacks, because it's beyond me. | Image credit: Rock Paper Shotgun/Playstack
Closest Beacon: Executioner's Pulpit Beacon
Location: After beating Tishina's Confessor, proceed onwards until you meet Ruk. The Nameless Captive's pit is right below.
It's Chainsaw Man! Or rather, it's a guy with a huge blade stuck through his head instead of a chainsaw, but the concept is similar. The Nameless Captive, at any rate, is a boss designed for parry sickos, and you'll even get an Achievement if you manage to parry all of his rotating sword-head swings in a row.
This fella is certainly the hardest opponent you've faced thus far, but almost none of his attacks are unblockable, aside from a nasty kick which he tends to use in the second half of the fight more than the first. Parry, Perfect Guard, or Perfect Harden as best you can, and if you mess up, evade rapidly to the side multiple times in a row to avoid the Nameless Captive's blade, which really does have a mighty range.
In the boss strategies prior to this one, I mentioned my tactics of interrupting large foes with Grisha summons (equip the Grisha Remnant as your passive rather than your active for more summons), and a flung Battle Axe (thanks to the Infused Stone). These tactics worked well for me when it came to messing up the Nameless Captive's swings and creating distance between myself and his sword-head. Still, perfecting this fight took me the better part of an hour, and you'll likely need to try it many times as well.
Mark boss as defeated.
21. Pale Grisha
This Grisha's as white as snow! What a handsome lad. | Image credit: Rock Paper Shotgun/Playstack
Closest Beacon: One Legged Wolf Beacon
Location: From the One Legged Wolf Beacon, turn left and head through the cliff path behind you, avoiding the hulking swordsman. Veer right and move forwards into the area with the white mushrooms all over the ground and the giant bells, then immediately turn left into a side road that leads into a wet clearing. Some cultists are here; turn right after defeating them and keep moving forwards until you reach a hidden dungeon - the Grisha Hunting Ground. The Pale Grisha is the boss of this dungeon.
By now, you should be used to fighting Grisha, and this is the last one in the Fainweald region. Aside from its colouring, the Pale Grisha's attacks are familiar, though it does hit harder and possess more health than its cousins. Dodge its arm strikes and fire back with your best attacks. If you've got Grisha Remnants at your disposal, equip them to help make the combat a tad easier. Nothing like some Grisha versus Grisha action, eh?
Mark boss as defeated.
22. Bor the Deluded Monarch
Bor honestly reminds me of that famous picture of Biggie Smalls wearing a crown. Go on, look it up. | Image credit: Rock Paper Shotgun/Playstack
Closest Beacon: Abbey Entrance Beacon
Location: Head to the front of the Sester's Refuge, the abbey in eastern Mammon inhabited by the members of Sester Genessa's order. The Abbey Entrance Beacon is just beyond a pair of Bone Gates. Bor's the boss of the Kingdom of Fools dungeon, which opens when you Cleanse the Beacon.
Bor is a deluded head wearing a crown, and you'll have to commit regicide. Whack away at Bor with heavy attacks and get ready to parry his jump. He'll gnaw at you and kick with his legs, and halfway through the fight a mass of mobs joins the fray. Nothing too hard; zap 'em with the Lute and watch them beat up their monarch for you.
Mark boss as defeated.
23. Twin Sesters
Barely a boss; more like just a few more mobs from the Sester's Refuge. | Image credit: Rock Paper Shotgun/Playstack
Closest Beacon: Sester's Gate Beacon
Location: Go towards the Corrupted Gate in the Sester's Refuge to find the Sester's Gate Beacon right outside. Cleanse the Beacon to enter the Sester's Bastion dungeon, where these gals await you.
Seeing as how you've had to survive the corridors of the Sester's Refuge to get here, these ladies shouldn't be much trouble. Take out the crossbow-wielding one first if you can, then defeat the one in red. Just keep a close eye on her stance - if you haven't already noticed, the red sesters can parry your attacks and deal prodigious damage with their rapiers.
After you've beaten the first pair, another sester with the Black Needle spear will emerge, and the title of the boss changes to 'Stray Sesters'. She's not much harder than the first two, so get ready to claim that spear for yourself.
Mark boss as defeated.
24. Sester Secundus
Justice for Genessa! Sester Secundus must go down! | Image credit: Rock Paper Shotgun/Playstack
Closest Beacon: Sester's Gate Beacon
Location: Sester Secundus is a secret boss; refer to our guide on how to unlock Sester Genessa as a playable character for the full intel. Basically, you need to drop down to the Revenant Graves (the area with the red trees) beneath the Sester's Refuge, then head towards the northern wall to find a ghostly censer. Interact with it and you'll be teleported to this fight.
Sester Secundus is very similar to the female cultists you've been fighting for a while now, with a lengthy spear and the ability to shoot lightning. She's got long range, but is easily staggered with heavy combos. As long as you avoid her lightning blasts and corner her with aggressive strikes, she'll go down fast and you can finally claim vengeance for Sester Genessa.
Mark boss as defeated.
25. Caged Grisha
Poor Grisha, being forced to wear that mask and subjected to these frozen conditions. | Image credit: Rock Paper Shotgun/Playstack
Closest Beacon: Winterglass Lake Beacon
Location: The Corrupted Gate by the Sester's Retreat leads to the snowy Valley of the Revered, and the Winterglass Lake Beacon is the first save point within this location. You'll fight the Caged Grisha after you Cleanse the Winterglass Lake Beacon.
Another Grisha, and aside from wearing a mask and living in the snow zone, it's much the same as the rest. The same lessons you've learned from past Grishas still apply - beware the unblockable arm-blade thrusts, corner the bastard against the side of the arena, knock him down with repeated strikes, repeat.
Mark boss as defeated.
26. Urrig, the Executioner
Urrig swings that hammer all over the darn place, really putting his body into it. Kind of admirable, if he weren't trying to kill you. | Image credit: Rock Paper Shotgun/Playstack
Closest Beacon: Winterglass Lake Beacon
Location: From the Beacon, proceed across the bridge over the frozen lake by firing your sidearm at a bell in the distance, which makes platforms rise up. The following path is largely linear and has a few enemies in the way, including Skulks who explode into ice and Grisha Hunters. At the end is a drop into an arena where Urrig waits.
Urrig is similar to the other big fellows with oversized weapons you've fought in the past, but he's a tad slower. He'll telegraph his hammer swings very obviously and frequently attacks with the following combo: one unblockable strike, followed by a slight pause as he continues to rotate his body, then two more unblockable strikes, followed by a final unblockable strike that creates ice when it hits the ground. Dodge around him as he does these rotations and hack away with a fast weapon.
Mark boss as defeated.
27. Tyrant's Sychophants
A bunch of skeletal mooks, eh? Grind their bones to bake your bread, I say. | Image credit: Rock Paper Shotgun/Playstack
Closest Beacon: Ovate's Chamber Beacon
Location: Cleanse the Ovate's Chamber Beacon to enter the Pilfered Crypt mini-dungeon, where these skeletons await.
An easy battle to warm you up before you face the big boss of the Valley of the Revered, these skeletons aren't much of a workout, and rise after you defeat a smattering of Grisha Hunters in the area. Lute 'em if you like, or simply avoid their strikes and smash them to pieces with your hardest heavy attacks. The worst thing here is getting cornered, so keep moving.
Mark boss as defeated.
28. Droeg, the Conquerer
Droeg's a mean frost giant with a huge bone club, but the flaming ice balls that he tosses at you in the second part of the fight are somehow worse. | Image credit: Rock Paper Shotgun/Playstack
Closest Beacon: Ovate's Chamber Beacon
Location: The Ovate's Chamber Beacon is the last Beacon in the Valley of the Revered. Head onwards from the Beacon until you meet Ruk, then jump through the Bone Gate to fight Droeg.
Droeg can be a pain, but he's one of those Soulslike bosses that's actually a bit easier if you stay close to him. His club packs a real punch, so when he kneels on the ground, get ready to parry his back and forth swings or dodge to the side - it's possible for your Harbinger's i-frames to avoid the swings entirely. Watch out when he stomps his foot, and be careful to avoid his unblockable club slam.
Do enough damage for a riposte, and Droeg will begin unleashing flaming balls of ice that do a tonne of damage if they hit you. Watch their movements carefully, and dodge when they come down. Droeg will repeat these projectiles for the remainder of the fight, and they killed me more often than his club! Don't ever stand in a place for too long, and spam the dodge button as much as you can.
Protecting against the Frozen status effect during this fight is highly recommended, as Droeg's slams and the flaming ice balls can both stop you in your tracks. Martyr's Ash does the trick - equip it as your active and then immediately activate it when you enter the second half of the fight.
Mark boss as defeated.
29. Viletongue Batushka
This dude spiked my drink! He's gonna pay for that. | Image credit: Rock Paper Shotgun/Playstack
Closest Beacon: Castigator's Keep Beacon
Location: Castigator's Keep is the Beacon in the south-central green region of Mammon. Cleanse it to enter Viletongue's Domain, then proceed through the dungeon until you reach a room with a gated Ovum and a Strange Concoction. Drink it, and your vision will blur as psychedelic effects take hold and the fight begins.
Viletongue Batushka is really just one of those creepy monks with the elongated tongues that you've been fighting for a while now, but this battle is made disorientating by the topsy-turvy nature of the room, where all of your directions will be reversed! Up is down, left is right, and so on. Moving your Harbinger around will be difficult at first, so I suggest using Vatra's Seal to harden yourself against Viletongue's blows as you get your bearings. Then proceed to beat the crap out of him.
Mark boss as defeated.
30. Vellen, High Lord of Mammon
Like most nobles, Vellen is all talk and very little substance. Pound into him and grab Lazlo for your next Shell. | Image credit: Rock Paper Shotgun/Playstack
Closest Beacon: High Lord's Courtyard Beacon
Location: Take a look at our guide on how to unlock Lazlo, since Vellen is a required boss along the way. You'll need to go up the stairs from the High Lord's Courtyard, ride the air current to the following courtyard, and then veer right until you're in the Royal Crypt of Mammon. From there, it's a narrow pathway to Vellen's boss room.
He was a real meanie to our loveable chonky friend Lazlo, but in combat, Lord Vellen is a beanpole who will die quickly to your combos. He has a scythe with considerable range, but a constant barrage of heavy attacks will make short work of him, opening up the door beyond to Lazlo's resting place.
Mark boss as defeated.
31. Prophet of Profane Infinities
Blast the Prophet or parry his hammer swings for big Break damage, then proceed to show him that his profane infinities are nothing to you. | Image credit: Rock Paper Shotgun/Playstack
Closest Beacon: Abandoned Outpost Beacon
Location: Enter the ruined town near the Beacon and head southwards until you reach the Deserted Slums, which lead to the Gate of Mammon. Keep an eye out for Tarblighted Miner enemies if you're getting lost, and if you're searching for the location of the Obsidian Hammer, you'll naturally end up here. Head to the lowest level of this mining shanty town, where several obsidian rectangles can be found poking out from huge puddles. Hidden within a small cave is the entrance to the Obsidianite Mines, and the Prophet is the boss of this dungeon.
The Prophet of Profane Infinities is a slightly stronger Faceless Clerik, referring to those hooded fellows with the big hammers that you may have already battled. (And if you played Mortal Shell 1, you'll remember Faceless Cleriks as one of the prominent enemies in the last area.) He comes at you with a big swing and will bang his hammer repeatedly on the ground. Parry the swing, avoid the unblockable hammer bangs, and retaliate.
Mark boss as defeated.
32. Subjugated Guardian
I fell into the lava while running to get to this guy and lost 20,000 Gloom. That's why they call it "Gloom" - to describe the deep depression I felt afterwards. | Image credit: Rock Paper Shotgun/Playstack
Closest Beacon: Abandoned Outpost Beacon
Location: Instead of turning down into the Deserted Slums from the Abandoned Outpost Beacon, take the path that leads north towards the Lonesome Spire. The top of this tower contains the Black Market, and as you're heading through rooms on the way up, keep an eye out for a dungeon entrance within a small alcove. This leads to the Sentry's Grave, and the Subjugated Guardian waits for you at the end.
Reaching the Subjugated Guardian is tougher than the fight itself, as the Sentry's Grave is full of Subjugated Sentries (the enemies with crossbows for heads). The pathway to the Guardian is also above pits of lava, with all of the Sentries shooting at you along the way. The Subjugated Guardian also fires at you from his crossbow-head, but as long as you dodge these flaming bolts and interrupt him with your best attacks, he'll fall quickly.
Mark boss as defeated.
33. Infested Miner
Somebody drop a rock on top of this Infested Miner's head! | Image credit: Rock Paper Shotgun/Playstack
Closest Beacon: Gate of Mammon Beacon
Location: Cleanse the Gate of Mammon Beacon, which sits right in front of the Corrupted Gate in Mammon. The Infested Miner is the boss at the end of the unlocked Burrowkin Dwelling dungeon.
The Infested Miner is similar to other Tarblighted Miners, but you'll be facing him in a room full of Lithopods, and he can also make rocks rain from the ceiling. Since he apparently likes to make it rain, use your Lute to infect the Lithopods with confusion and have them rain their claws down on him.
Mark boss as defeated.
34. Strange Grisha
This unusual Grisha designs makes me think of how the Predator in Prey looked different from the Predators in the other films. | Image credit: Rock Paper Shotgun/Playstack
Closest Beacon: Gate of Mammon Beacon
Location: Enter the Corrupted Gate behind the Gate of Mammon Beacon, then run through the following passageway until you reach a wooden structure with a stairway. Go down, then turn left to enter the Withered Shoals dungeon. Several large skeletal ribcages abound; go past them and turn right at the Grisha Hunters to find a Bone Gate that teleports you to the Strange Grisha's arena.
This Grisha is apparently classified as strange because it looks a bit more alien than its kin. Maybe it came down from the stars like the Hexapod, or was mutated in some manner! Despite the difference in looks, it fights pretty much the same as every other Grisha you've come across thus far. Dodge the blades on its arms, strafe to the side, hack away.
Mark boss as defeated.
35. Hexapod
Time to avenge our dear H. R. Giger-inspired girlie Proxima. Shoot this alien from the stars! | Image credit: Rock Paper Shotgun/Playstack
Closest Beacon: Nameless Pass Beacon
Location: The Nameless Pass Beacon is the last save point in the Withered Shoals dungeon, so just continue on the path that extends upwards until you meet Ruk, who tells you about the Hexapod. Drop down to begin the fight.
If you've unlocked Proxima's memories, you may have gotten a glimpse of her fighting this otherworldly entity with the Triarch Repeater. Memories echo reality, and firing that mega machine gun into the Hexapod is an excellent way to soften it up for a riposte or two.
Since the Triarch Repeater is also pretty slow, make your shots count by equipping either the Deadeye Stone or Marksman's Stone (which improve ranged critical damage and critical chance, respectively) alongside the Rupturing Stone, which makes projectiles that strike critically deal Break damage. This will ensure that a steady stream of shots will eventually trigger a riposte opportunity.
This tactic works consistently throughout the fight until the end, where the Hexapod gets faster, dives into the water of the arena, and occasionally tries to rush you down. Try to establish distance to pull the Triarch Repeater out again, and jump in close for melee attacks when necessary. If you're not a fan of the machine gun strategy, you can simply rely on melee combos, but you'll need to take extra care to avoid the Hexapod's unblockable grab.
Mark boss as defeated.
36. Starved Harridan
She's a challenging boss to mark the entrance to a challenging region, but at least you can kill the Starved Harridan by cheesing her into the lift if you so desire. | Image credit: Rock Paper Shotgun/Playstack
Closest Beacon: Castigator's Keep Beacon
Location: From the Castigator's Keep Beacon, take the stairs down into the courtyard of the keep, then head north through the room with two exploding enemies. You'll emerge in a Grisha Hunter camp. Veer left up the stairs, pass through a candlelit corridor, and you'll reach a bridge with a lever that activates a lift. Take the lift to the Vestige of Infinity, a region of white ruins in the southernmost part of Mammon. The Starved Harridan awaits in an arena right above the lift.
The Starved Harridan is fast, and has an unblockable harpy-style scream that will knock your Harbinger off their feet. If you manage to strafe around her as she's screaming, you can smash into her back a few times. You should also dodge the talon projectiles she tosses, and avoid staying in your vulnerable non-Shell form for very long, as two or three strikes from the Starved Harridan were enough to kill me.
If you want to cheese the Starved Harridan, send the lift back down, kite her towards it, and try knocking her off. You can also use an attack that knocks both of you off, as long as you're wearing Vatra's Seal. Harden mid-air to avoid fall damage, and watch as she's unable to do the same!
Mark boss as defeated.
37. Sariel, the Endless
The first fight with Sariel's not too bad, as you can knock him to his death easily. The second fight requires you to destroy the stones powering his infernal resurrections, or else things will get hairy fast. | Image credit: Rock Paper Shotgun/Playstack
Closest Beacon: The Silent Steps Beacon
Location: From the Beacon, take the Bone Gate to teleport to the nearby high structure with the brutalist architecture, then go to its centre extension. Sariel will appear to fight you for the first time. When the battle's won, explore the stairs behind the large statue nearby to find the Chamber of Becoming dungeon, where Sariel waits for you again. Our guide on how to unlock Sariel has more details.
A multi-part boss battle against a Shell; how original! The first time you face Sariel he'll run at you with his Clockwork Scythe. I flung my Battle Axe at him and swiped him off of the tower to his death, which was both hilarious and effective.
The second time you face him inside the Chamber of Becoming, he's got tricks up his sleeve. He'll appear to challenge you as you proceed into the dungeon, and will disappear after taking some damage before reappearing in a room with a sigil on the ground. Notice that the sigil is bordered by stones. You need to destroy the stones, or else Sariel will keep resurrecting himself whenever his HP is depleted. Overall, this might be a somewhat taxing battle, but once you attack the stones, it's not a hard one.
Mark boss as defeated.
38. Gloombound Wraith
The Gloombound Wraith is a bookworm gone wild. There are a lot of pages flying around during this combat; don't let them distract you from the red books that need destroying. | Image credit: Rock Paper Shotgun/Playstack
Closest Beacon: Gate of Infinity Beacon
Location: When you Cleanse the Gate of Infinity, which lies just in front of the Corrupted Gate in the Vestige of Infinity, you'll be taken to the Forbidden Archives mini-dungeon. Progress through this unusual bookshelf-lined library and find the Grimorium Obscurum atop the stacks of shelves. Place it on the altar to unlock the room with the Ovum, where the Gloombound Wraith will attack you.
On the surface, the Gloombound Wraith is similar to many of the Wraith enemies you've fought previously. But as the battle proceeds, it'll surround itself with an array of floating books and pages, becoming impervious to your strikes.
Remember how you had to smash stones in the fight against Sariel? The same is true here. When the Gloombound Wraith becomes invincible, look for two books pulsating with red energy on either side of the battlefield. Destroy those, and you'll be able to inflict damage once more.
Mark boss as defeated.
39. Solnir, the Gloom Seeker
Solnir and all of the other Gloom Seekers remind me of Hellraiser. | Image credit: Rock Paper Shotgun/Playstack
Closest Beacon: Citadel Annex Beacon
Location: The Citadel Annex is the first Beacon of the Ashen Sanctum, the dungeon that ends in the battle against Sir Isaac. From here, it's a lengthy but linear route against several enemies who are rendered invincible by blue flames, and Solnir's one of these.
Destroy the blue flame that gives Solnir his unnatural strength as soon as possible, which is probably something you'll figure out on the way here. Two solid slashes with your weapon should do it, and then Solnir's no different from any of the other Gloom Seekers you've met during your journey.
Mark boss as defeated.
40. Servants of the Scholar-Prince
Goodness, Sir Isaac sure boasts a huge posse. | Image credit: Rock Paper Shotgun/Playstack
Closest Beacon: Citadel Atrium Beacon
Location: The Citadel Atrium is the last Beacon of the Ashen Sanctum, and right before the fight with Sir Isaac. Cleanse it to be taken to the Servant's Hall, which automatically starts the fight.
You know what to do with this vast array of miscreants - zap 'em with the Lute and break the blue flames! That said, you still need to watch out for the Knights of Mammon, who'll come rolling through the arena and potentially disrupt the chaos you've expertly created. Also, bear in mind that there are two blue flames, and the second is hidden behind the pillar in the centre of the arena.
Mark boss as defeated.
41. Sir Isaac, the Scholar-Prince
Sir Isaac boasts the coolest design of all the bosses, and really looks like Hollow Knight with realistic graphics. He's also an asshole of an opponent. | Image credit: Rock Paper Shotgun/Playstack
Closest Beacon: Citadel Atrium Beacon
Location: Turn around from the Beacon and head up the stairs until you meet Ruk, who will fill you in on the Scholar-Prince's backstory. Then get ready for a heckuva battle.
After much hype and fanfare, here he is - the giant fly that is Sir Isaac. And he is an absolute ache in the butt. This fight has two phases, and in the first, Sir Isaac carries a shield that he'll use to absorb some of your damage. Strafe around him and try to hit the side that's shieldless, and don't bother using ranged weapons, as he'll simply block your shots.
After a third of his health is gone, he'll cast the shield aside and go berserk with four blades. He is a monster to be reckoned with in this form, and will launch himself into the air and do multiple stabs into the ground that require repeated dodging backwards. He only has one unblockable move - a grab - but if he catches you with it, he'll proceed to blast you in the face and drain nearly your entire health pool. (In general, one or two strikes from Sir Isaac in his second form is enough to kill you.)
If you're skilled at parrying, you might be okay, but learning Sir Isaac's moveset takes a long time. I struggled with this fight, and eventually found success with a Proxima Lightning immunity build. I repeatedly used Proxima's Biosampler to inflict Lightning stacks, which did damage over time, and hacked away at Sir Isaac until he let go of his shield. Then it was a matter of maintaining distance from his blade barrage by constantly flinging my Battle Axe at him, thanks to the Infused Stone. Running out of Resolve to chuck my axe did become a problem, but luckily I had Common Moonshine equipped to help me win by the skin of my teeth.
Mark boss as defeated.
42. The Monolith
I hate this boss. When the death lasers come out, get ready to hit the dodge button. Dodging towards them is easier than moving in the opposite direction, ironically. | Image credit: Rock Paper Shotgun/Playstack
Closest Beacon: Obsidian Vault Beacon
Location: This fight is located just beyond the Obsidian Vault Beacon, which is one of several Beacons in the multi-layered final area of the game, which is full of branching paths and opens up beneath the Marrow Keep after you've found enough Ova to receive a special cutscene from the UnderMether. If you've previously unlocked the Brether's Court Beacon, then you're on the path to fighting the Monolith.
The Monolith is the most wretched foe in Mortal Shell 2, and as of this writing, has been buffed, nerfed, and re-nerfed multiple times in patches. It's still a rubbish boss, even with the nerfs, and acts like a Thwomp in the Mario games, slamming its mass onto the ground multiple times. Thankfully, these slams can be parried or hardened, and I prefer hardening to take advantage of i-frames at just the right moment. The Monolith will also swing the questionable-looking fleshy mass in its middle at you, and this can also be parried.
Once you've dealt enough damage to get a riposte in, the Monolith switches tactics. Instead of slamming straight down onto you, it starts doing an annoying roll that requires a mixture of dodging and parrying/hardening to avoid. It will also start to shoot lasers, and these will either track you directly or appear as arcs that swing back and forth. Dodge into the swinging lasers to pass through them safely, and as this move occurs, try to dash towards the Monolith's back to get hits in, as the lasers won't yet extend there.
The third phase of the fight features the Monolith spinning like a top and occasionally flying upwards for an unblockable drop on your head. Dodge at the last second to avoid this. Then there's a death spiral of lasers as the Monolith unleashes arcs that swivel around the arena. Lock in as best you can when this occurs, and dodge towards the arcs to use your i-frames to pass through them. The arcs get faster and faster over time, meaning it will take a lot of practice to nail down the rhythm.
Mark boss as defeated.
43. Malborn Offspring
The Grisha squad is really putting in work here, keeping the Malborn Offspring down so he can't use any of his troublesome Lightning attacks. | Image credit: Rock Paper Shotgun/Playstack
Closest Beacon: Obsidian Vault Beacon
Location: Turn left from the Faithful's Shelter Beacon, and head up the slope and across the bridge lined with corruption to find the Malborn Offspring's arena. Faithful's Shelter Beacon is one of several Beacons in the multi-layered final area of the game, which is full of branching paths and opens up beneath the Marrow Keep after you've found enough Ova to receive a special cutscene from the UnderMether.
A very demanding boss, the Malborn Offspring's first phase sees him coming at you with his blade, often resorting to a combo composed of three slashes where the first two strikes can be parried but the third is unblockable. At times, he'll also go nuts with another unblockable move where he throws his sword at you, teleports to your location, and finishes with a jump slash.
The Malborn Offspring's second phase, activated once his HP is depleted, uses similar tactics as the first but with added Lightning damage. He's also more aggressive and utilises an unblockable grab all the darn time that has crazy tracking. Honestly, this phase is very frustrating unless you manage to disrupt and stagger him to the point where he can't get any of his attacks off at all.
To do this, it may be worth switching to a fast weapon like the Axatana (the best weapon in the game) paired with the Duality Tarstone, or a Shell like Sester Genessa, who can overwhelm him with her summons, as long as they actually manage to hit. Proxima's Lightning mitigation skills will also come in handy, but I personally managed to win this fight by overwhelming the Malborn Offspring with summoned Grisha thanks to the Grisha Remnant equipped as my passive.
Mark boss as defeated.
44. Orrem, the Discarded Golem
Go, Grisha army! Take down this tar golem bastard in memory of our dearly departed Harros! | Image credit: Rock Paper Shotgun/Playstack
Closest Beacon: Bridge of Procession Beacon
Location: Orrem awaits you right across from the Bridge of Procession Beacon. This is one of several Beacons in the multi-layered final area of the game, which is full of branching paths and opens up beneath the Marrow Keep after you've found enough Ova to receive a special cutscene from the UnderMether.
Orrem is similar to the Tar Golem you fought at the start of the game, and is the easiest of the four bosses in the final dungeon. He's still got two phases, though. The first phase sees him swinging at you with axes, which hit hard but are very readable and ripe for parry opportunities or Perfect Guards. Build up that Break Damage and riposte him to death, but be wary for his unblockable jumping attack, or his move where he slams both axes together.
In the second phase, he grows a tail and transforms into Orrem the Reclaimed. He's much faster than before and harder to parry, and you'll probably find him easier if you inflict Stasis stacks to slow his movements or focus on dodging. Like Malborn Offspring, Orrem also becomes a cakewalk if you can overwhelm him with summons, especially since he's a big boss who doesn't move much. Sic the Grisha or Genessa army on him and pound away.
Mark boss as defeated.
45. Zmey, the Unbidden
An annoying final boss deserves several annoying attacks to the bollocks. I'm serious, that's the best way to defeat this guy. | Image credit: Rock Paper Shotgun/Playstack
Closest Beacon: Hidden Nave Beacon
Location: The very last boss of the game, Zmey is only accessible after you defeat the other bosses in the final dungeon, giving you access to the Hidden Nave Beacon. Ride the air current that's just behind the Beacon to face him.
Zmey sucks, albeit not as much as the Monolith. But he's another oversized boss who uses BS tactics, including an unblockable tail move that will impale you from very far away and leave you vulnerable to a butt slam that's enough to separate you from your Shell, or kill your Shell-less Harbinger form immediately.
There's no easy way to say this, but when fighting Zmey, stay close to his giant balls. Yes, that's right - get under him and hack away at those crown jewels, and time your parries, guards, or hardens accordingly as he stamps his feet. He'll occasionally jump backwards and raise his arm to chuck his blade at you - when he does this, dodge immediately. If you've summoned Sester Genessa and Tiel to assist during the fight, they can also help to pull aggro away from you, but 9 times out of 10, you're the one that he's going to throw his sword at.
Partway through the fight, Zmey starts breathing fire, and if you manage to get a riposte in and lower his health enough, he'll unleash waves of AoE flames that must be dashed into to avoid. If you get hit with these flames, you'll suffer Cosmic Disease, an awful status that prevents you from getting back into your Shell or using skills and Tarstones. To circumvent this, equip the Seedbearer's Scripture as your active item, and use it when you're hit. You can get this elusive scripture by finding all three special Glands and presenting them to the Old Prisoner in the Forgotten Tower during Night Mode.
Using the Seedbearer's Scripture also sends a yellow ball of energy towards Zmey that will knock him over and give you a chance to attack. Take advantage of it, because honestly, the worst part of this fight is the dragon's obscene amount of HP. And the Slayer Seal is always there if you want to use it - trust me, Zmey fights with dirty tactics, so there's no shame in taking him down a notch or three!