
Hollow Knight Silksong walkthrough: Part 10 (Misc Quests)
Now's a good time to complete some side tasks


What's the next job for you to complete in Part 10 of our Silksong walkthrough? When you take a step back and think about it, you've already accomplished a lot in Hollow Knight: Silksong. Or so the Fleas would tell you, anyway. Still, there's a colossal amount left to discover; we've only scratched the surface so far.
In Part 10 of our Silksong walkthrough below, we'll guide you through a number of miscellaneous tasks and quests which you should consider completing before making any big next steps in the main story. You'll thank me later for carrying out these tasks now, trust me!
Want the walkthrough for a different area of the game? Check out our Hollow Knight: Silksong walkthrough hub!
Misc Quests walkthrough steps:
- Build the Lifesaving Bridge.
- Hunt 3x Flintbeetles.
- Hunt the Terrible Tyrant.
- Conquer the East Marrow gauntlet for a Mask Shard.
- Survive the attack on Bone Bottom.
- Buy the Bellhart map from Shakra.
- Fight the 2nd Skarrgard in Hunter's March.
- Complete the Far Fields obstacle courses.
- Find Zylotol in the Wormways.
- Collect 3 Plasmium from the Wormways.
- Obtain the Plasmium Phial.
1. Build the Lifesaving Bridge.
First step: head back to Bone Bottom, and interact with the Wishwall. By this point there should be 2-3 new additions, one of which you can complete immediately by donating 300 Shell Shards.

The Lifesaving Bridge, quite simply, is a small bridge built over the nearby hole in the ground leading into Moss Grotto. The same hole, in fact, which Hornet escapes in Silksong's opening cinematic. Now's as good a time as any to donate the money to have it built. You can reload the area to see the bridge in its finished state.
2. Hunt 3x Flintbeetles.
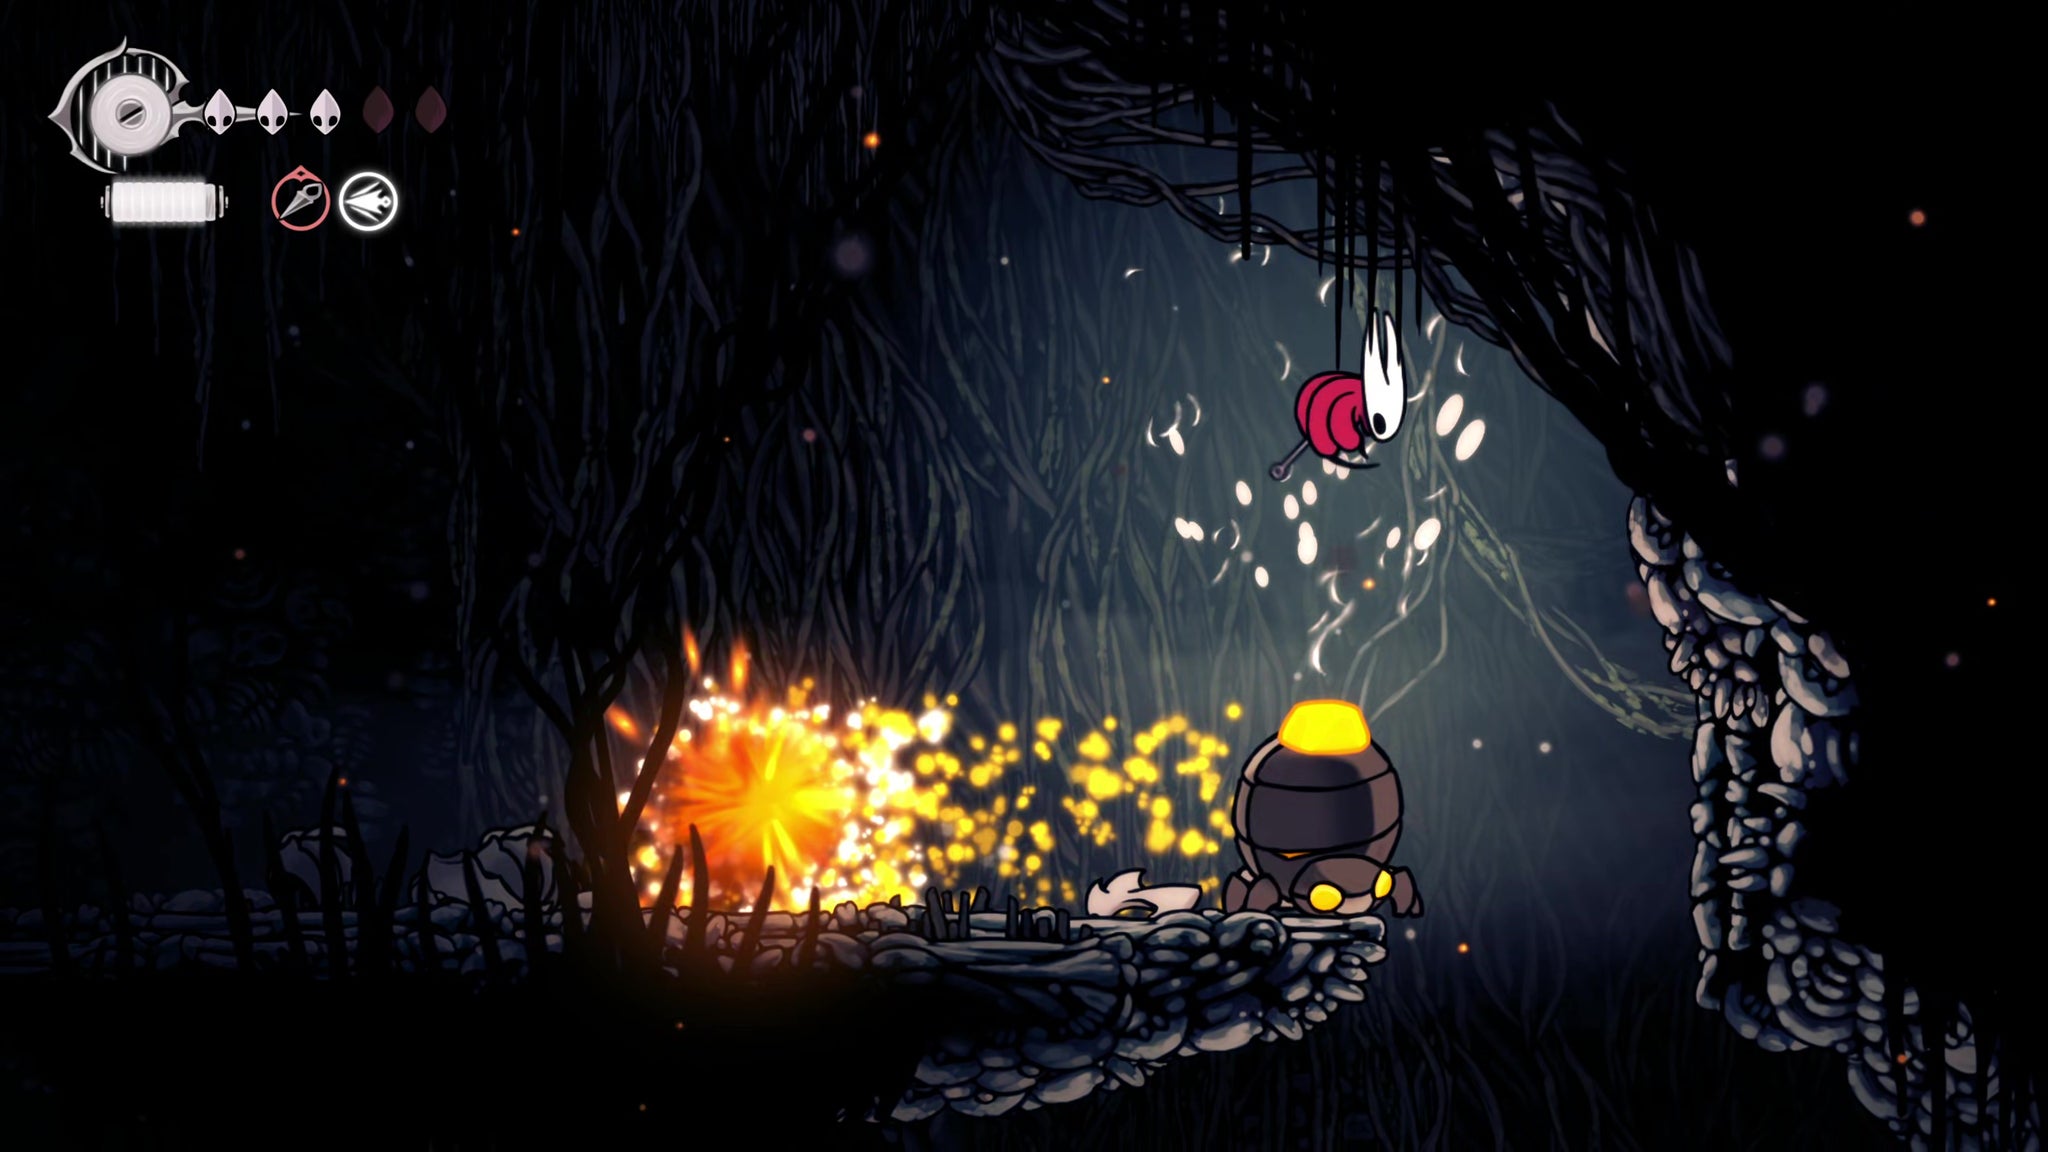
Another of the quests on the Wishwall is Volatile Flintbeetles - a hunting quest where you must track down and kill 3x Flintbeetles in The Marrow. These Flintbeetles are very easy to find, as each one has left behind a trail that Hornet can follow by interacting with what they leave behind. But to clear any doubt, here are the locations of the three Flintbeetles:

The Flintbeetles are quite aggressive, and can catch you unawares with that trail of explosions that follows their movements. Try to avoid jumping over them, and stay on one side to avoid the explosions. They're still regular enemies, so it won't take long to kill them.
3. Hunt the Terrible Tyrant.
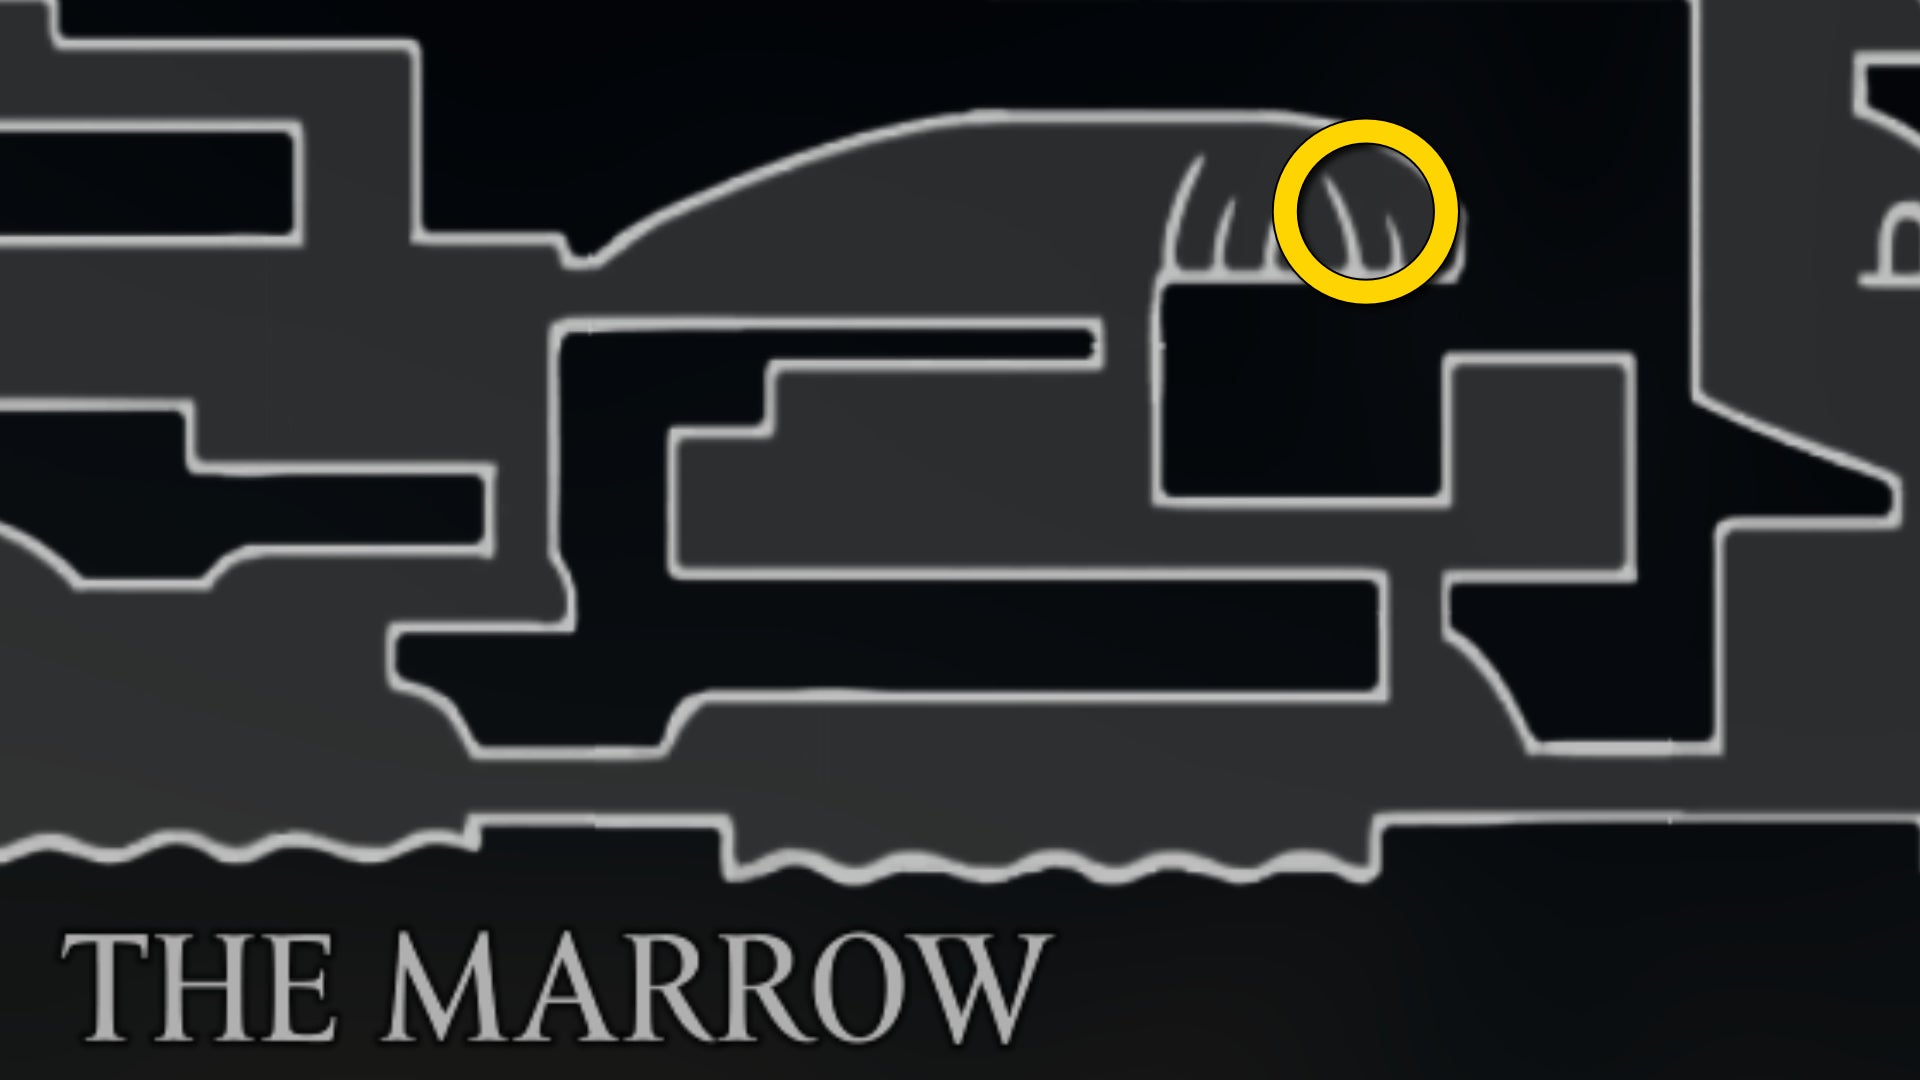
When you head back to claim your reward for the Volatile Flintbeetles quest, make sure you accept the Terrible Tyrant hunting quest if you haven't already. This Wish appears on the Wishwall after you gain the Claw Grip skill from Shellwood, and requires you to find the lair of the largest Skull bug of all, again in The Marrow.


The lair is easy to find - it's just about the only part of The Marrow map you haven't yet filled in. Head east from Bone Bottom and ride the moving platform to the right-hand side. Then climb above it to unlock this new area. Explore it fully - there's a breakable wall, the path behind which leads to two Rosary caches.
At the end of the path, you'll find (on the left) a shortcut opposite the Flea Caravan, and (on the right) the Skull Tyrant itself.

He's a nasty one, but his tells are obvious once you've learnt them. If it takes a run-up, it will charge and you should jump over it. If it wiggles on the spot, it will jump, and you can dash under it. If it roars, then watch out for the raining boulders. That's pretty much all you need to know to kill it and loot the Crown Fragment from its body as proof.
4. Conquer the Deep Docks gauntlet for a Mask Shard.
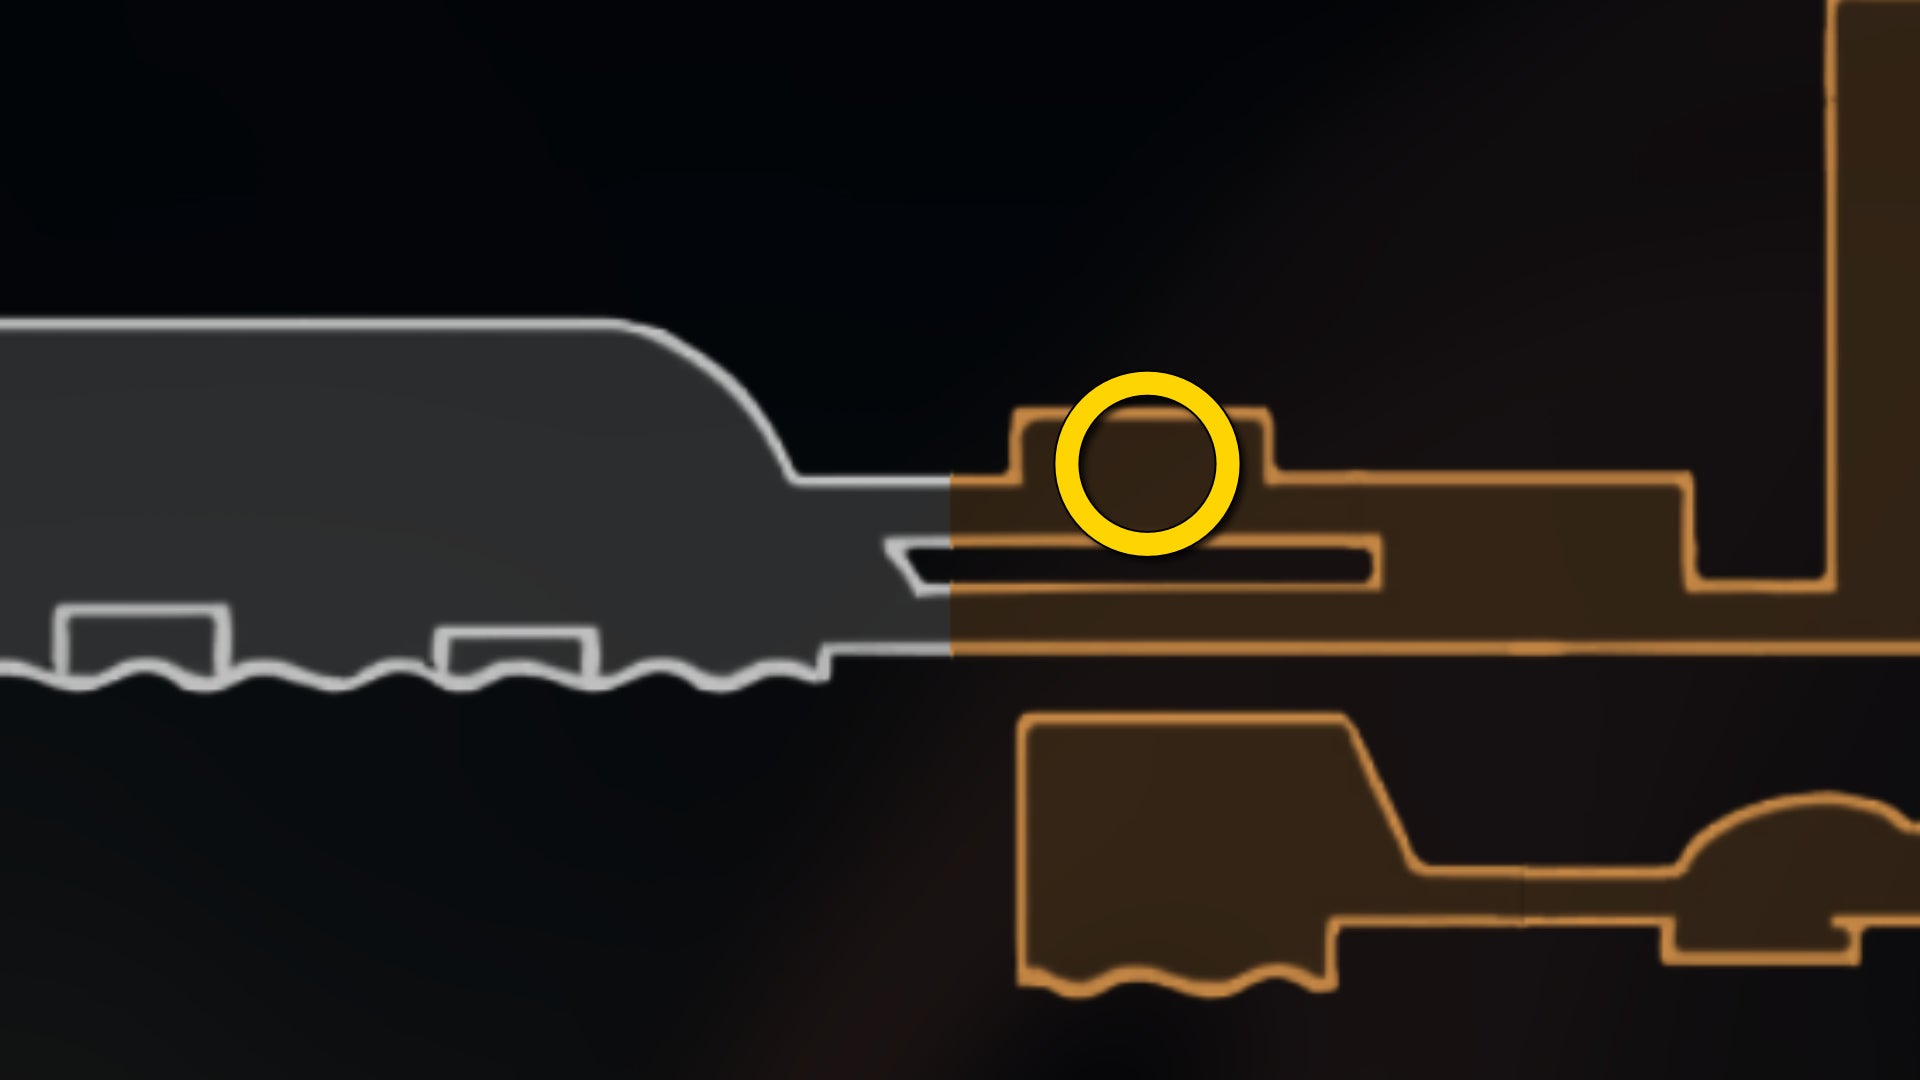
While you're in the vicinity, head back to the right-most room in The Marrow, and climb up the walls to get as high as possible. Then follow the metal platforms to the very right-hand side to unlock a little extra upper-level room just into Deep Docks, where you can face a gauntlet of enemies for a Mask Shard.

5. Survive the attack on Bone Bottom.

Return to Bone Bottom, turn in your Crown Fragment for the reward, and then head to the left. As you do, you'll quickly be interrupted by the aggressive appearance of another Skull Tyrant (the first one's mate, perhaps?). If it doesn't spawn immediately, exit the area and come back, and the Skull Tyrant should spawn.
This Skull Tyrant is a carbon copy of the previous one (raining boulders included), so you already know how to defeat it. Once it's slain, speak with the residents of Bone Bottom again, and you'll learn that there was an unfortunate casualty during the attack.
You can return at any later point to witness the funeral of the fallen Pilgrim.
6. Buy the Bellhart map from Shakra.
While in Bone Bottom, make sure you procure the Bellhart map from Shakra - it will be of great help in the next chapter of our walkthrough!

After the Skull Tyrant's attack on the village, the platform up to Shakra's spot in Bone Bottom may be broken. If that's the case, take the elevator upwards, and then make your way along to the right and drop down to reach Shakra from above instead.
7. Fight the 2nd Skarrgard in Hunter's March.
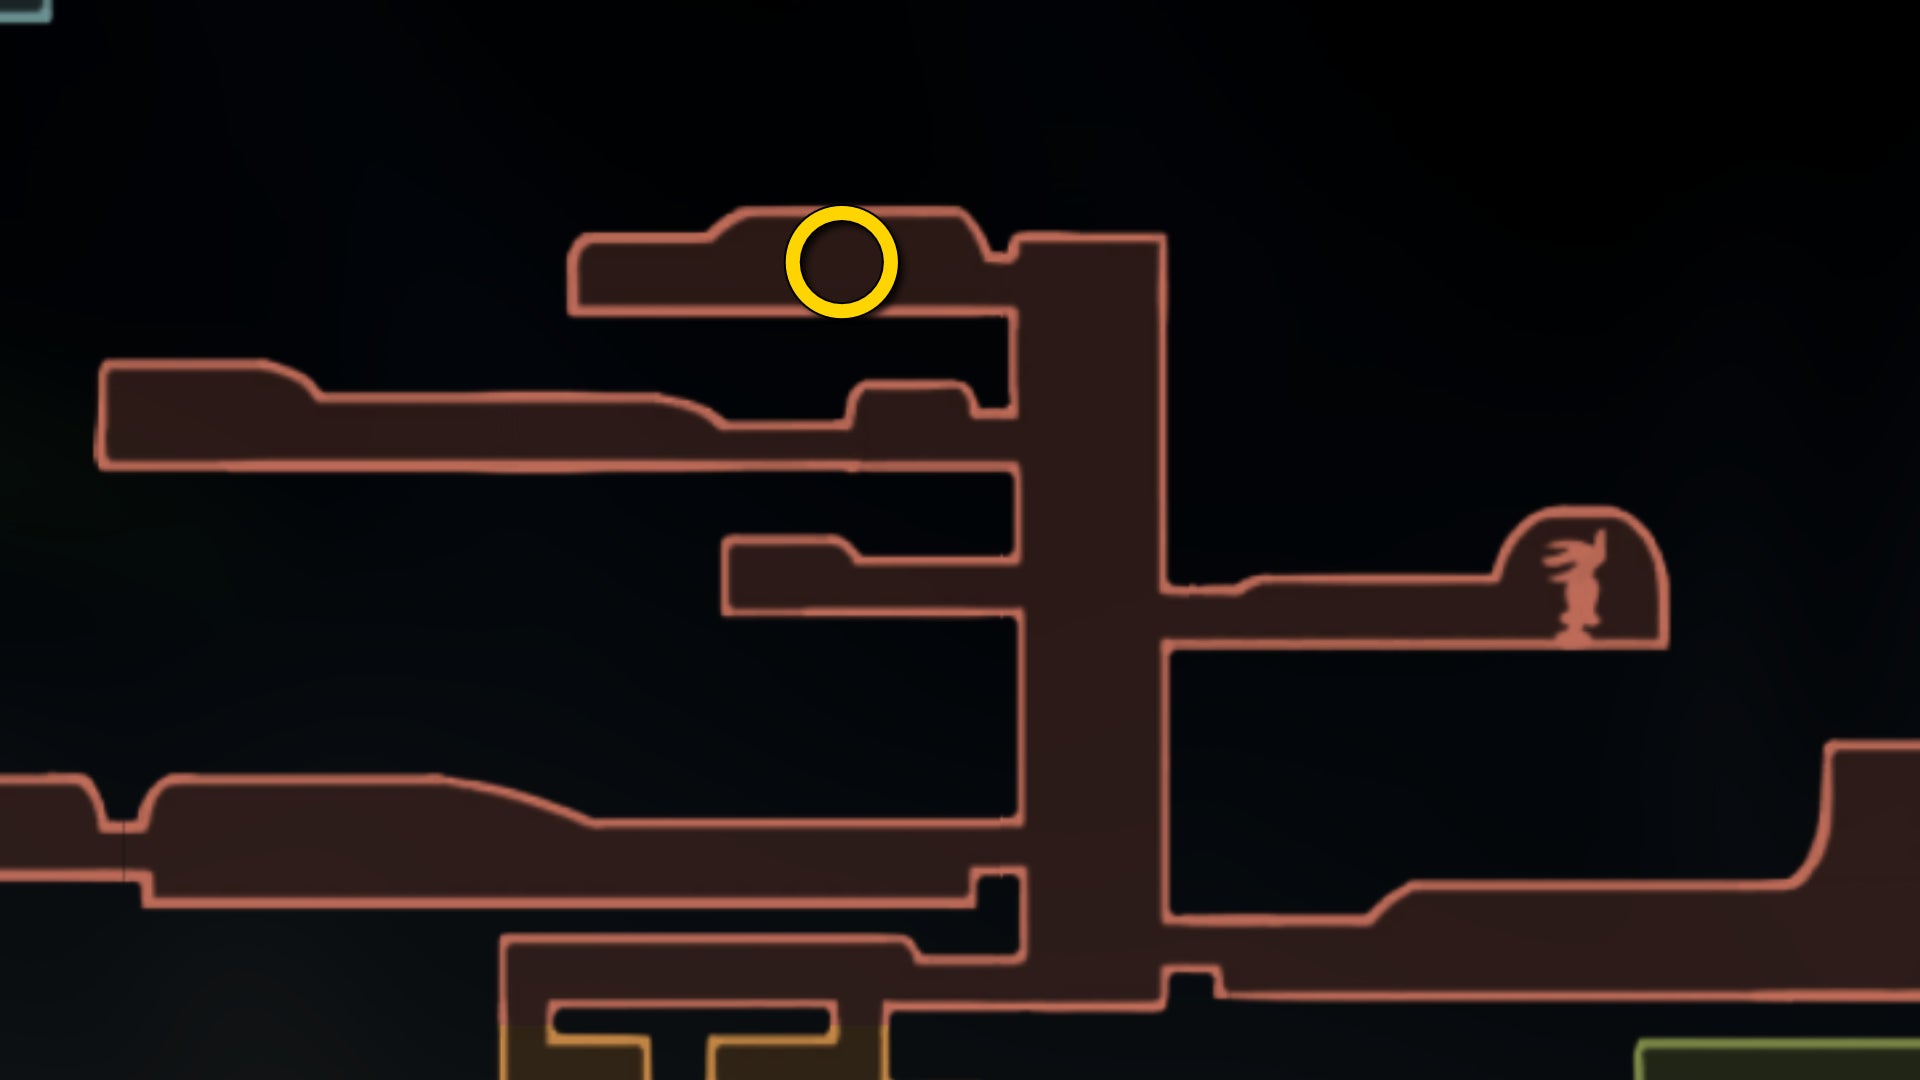


This task is pretty tricky, but there's one more spot of the much-hated Hunter's March region which you can now reach thanks to your Claw Grip skill. Head back into Hunter's March and make your way to the vertical shaft, and rest at the (previously trapped) Bench. Then climb the walls up to the very top of the shaft, and enter the room beyond.
In this room - and I'm sorry to break the news to you - is another Skarrgard to defeat. Remember the giant ant warrior guarding the passage into Hunter's March in the first place? Yeah, it's another of those guys. And this one is much harder, because it's joined immediately by a flying Spear Skarr who hounds you from a distance during the fight.

My recommendation is to use the Longpin liberally to damage both enemies at once from a (relatively) safe distance; and be very patient, because your windows for attacking are quite low with both enemies harrying you at once.
When you finally manage to defeat the Skarrgard, you get to enter a room behind, filled with Rosaries as a reward.
8. Complete the Far Fields obstacle courses.
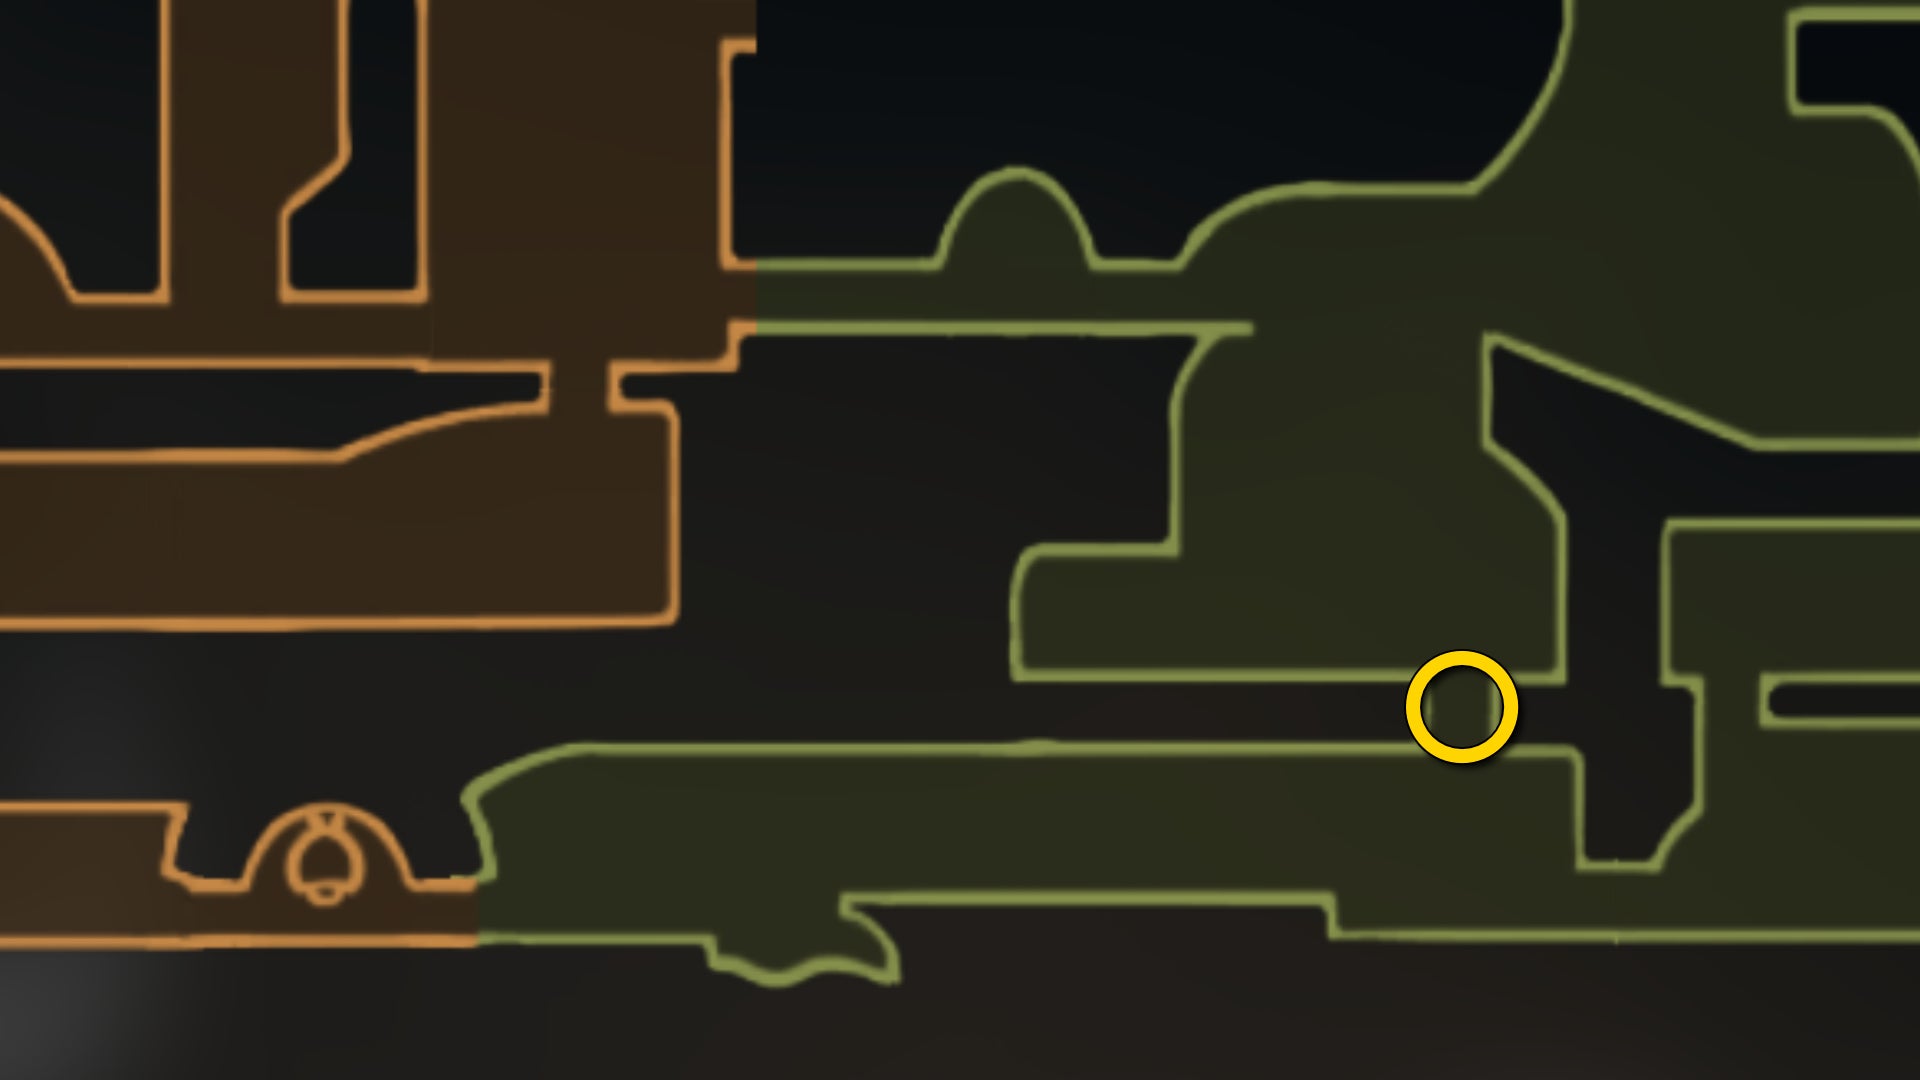

Next, there are two different (pretty tricky) obstacle courses hidden in Far Fields. So make your way into Far Fields via the entrance just past where you fought Lace. In this first room, you can now wall-climb to make your way into an upper room.
This room houses a fairly tricky obstacle course filled with spikes, air currents, and those red Pogo-able plants from Hunter's March. You can also unlock the upper shortcut to the Bench in Deep Docks, and it's a good idea to rest there in case you lose too much Health while attempting the obstacle course.


There's not much to explain here; complete the course, and you'll find a chest at the end filled with Rosaries. Next to the chest, you can then unlock a short stepladder down to more familiar ground within Far Fields.

Next, head to the Far Fields Bellway, and stand on the bell floor, then walk right to enter a secret passage that leads to an even harder obstacle course. This course at last allows you to reach the other side of that ominous banging door by Pilgrim's Rest - and there's also a Flea here for you to rescue.


As for the source of the banging, it's a large scarab beetle miniboss called a Rhinogrund, and it really packs a punch. You can either defeat it here and now - in which case, be careful, because death means having to repeat the obstacle course in order to try again - or you can flick the lever by the door to let it out into the world.
If you let the Rhinogrund loose, you can find it again only after reaching Act 3 of the game; it'll be waiting for you in one of the first rooms of Far Fields. I prefer to kill it here and now, but the reward is a bit meagre - just a Beast Shard for your efforts.
9. Find Zylotol in the Wormways.
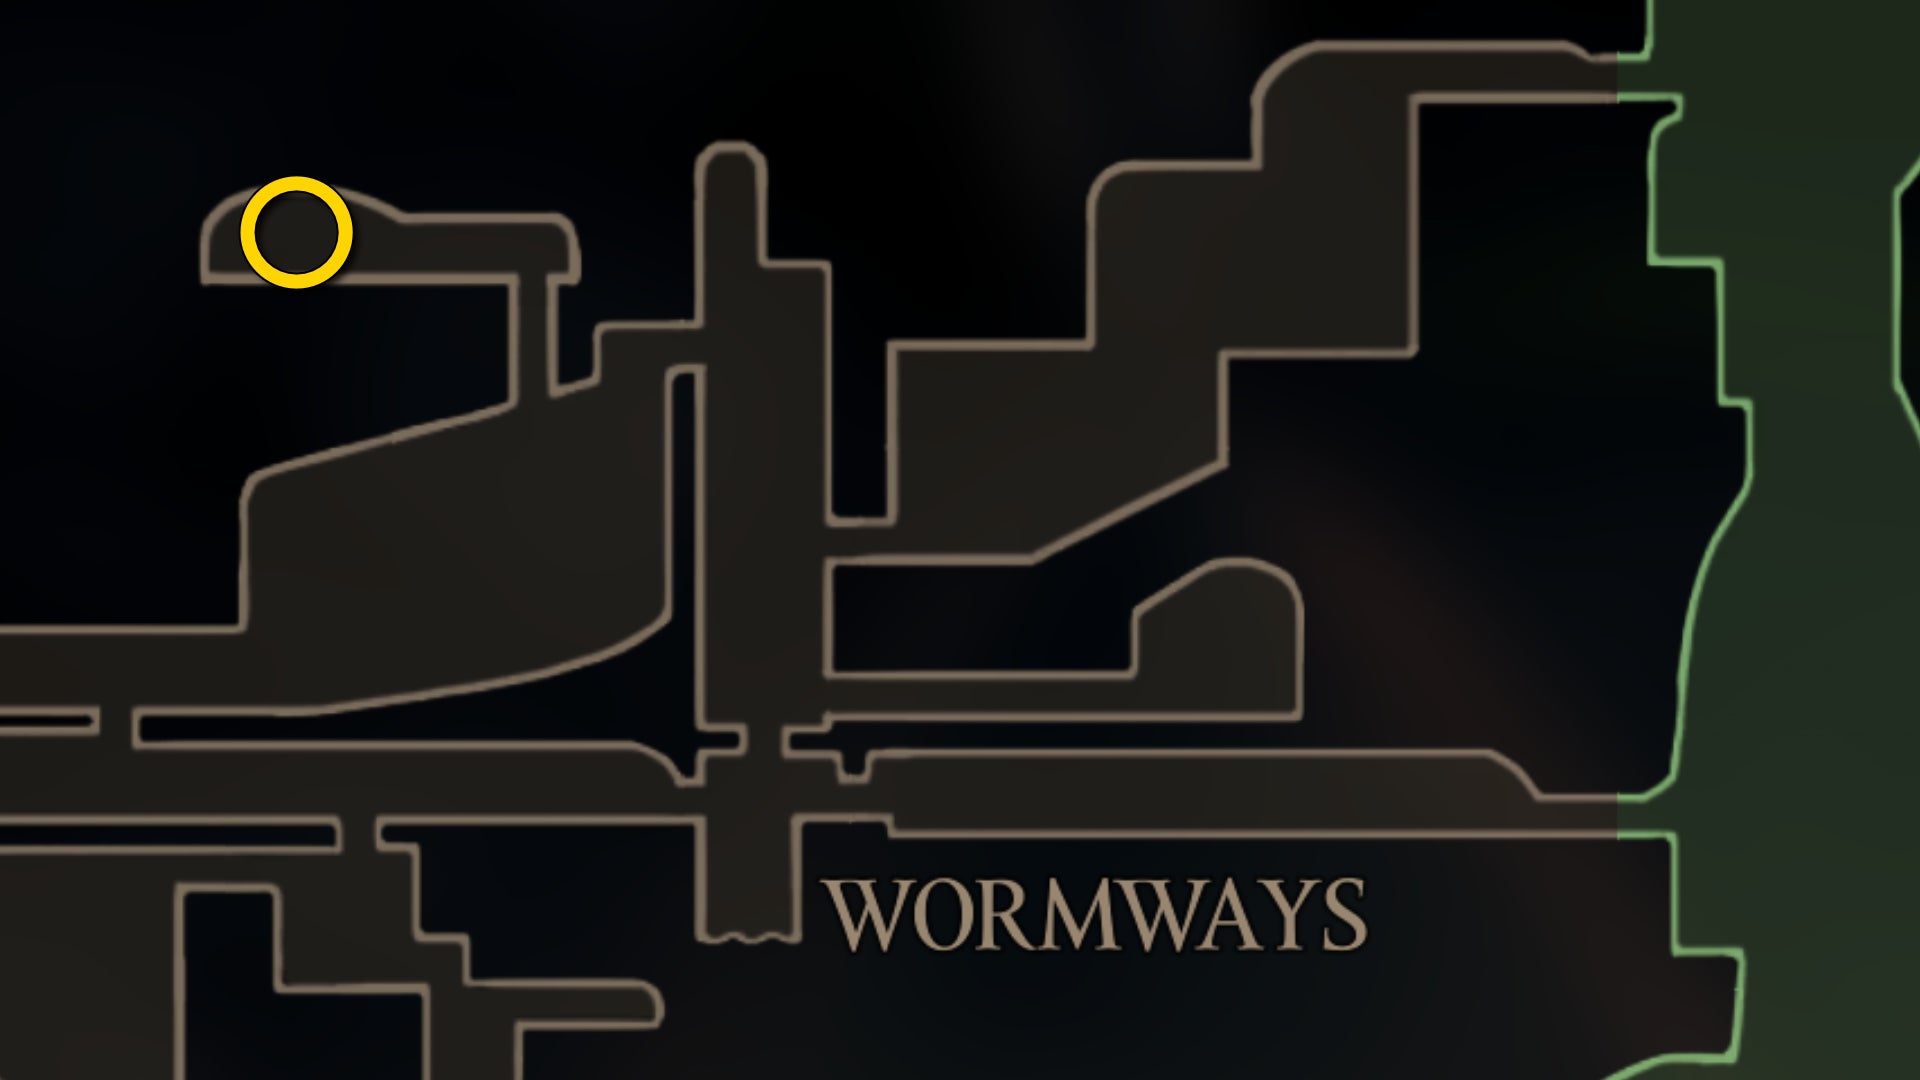
Our final task for Part 10 of our Silksong walkthrough sees you return to the perilous Wormways northwest of Bone Bottom. Use the elevator to reach it as you did before, and climb up the shortcut you unlocked, right next to the doorway into the Wormways. Climb up to the very top of the shaft and exit through the top-left doorway.


In the room beyond, bypass the first worm, and then climb up the next entrance you see above you. This will take you to a little hidey-hole where you'll meet a new NPC - Alchemist Zylotol.

Exhaust Zylotol's dialogue to accept his quest to collect Plasmium from the glowing blue orbs in the Wormways.
10. Collect 3 Plasmium from the Wormways.
Once you accept Zylotol's quest, he'll give you a Needle Phial (which needs equipping!). Rest at the Bench next to Zylotol, and equip the Needle Phial in your red tool slot. Then head back down into the Wormways.


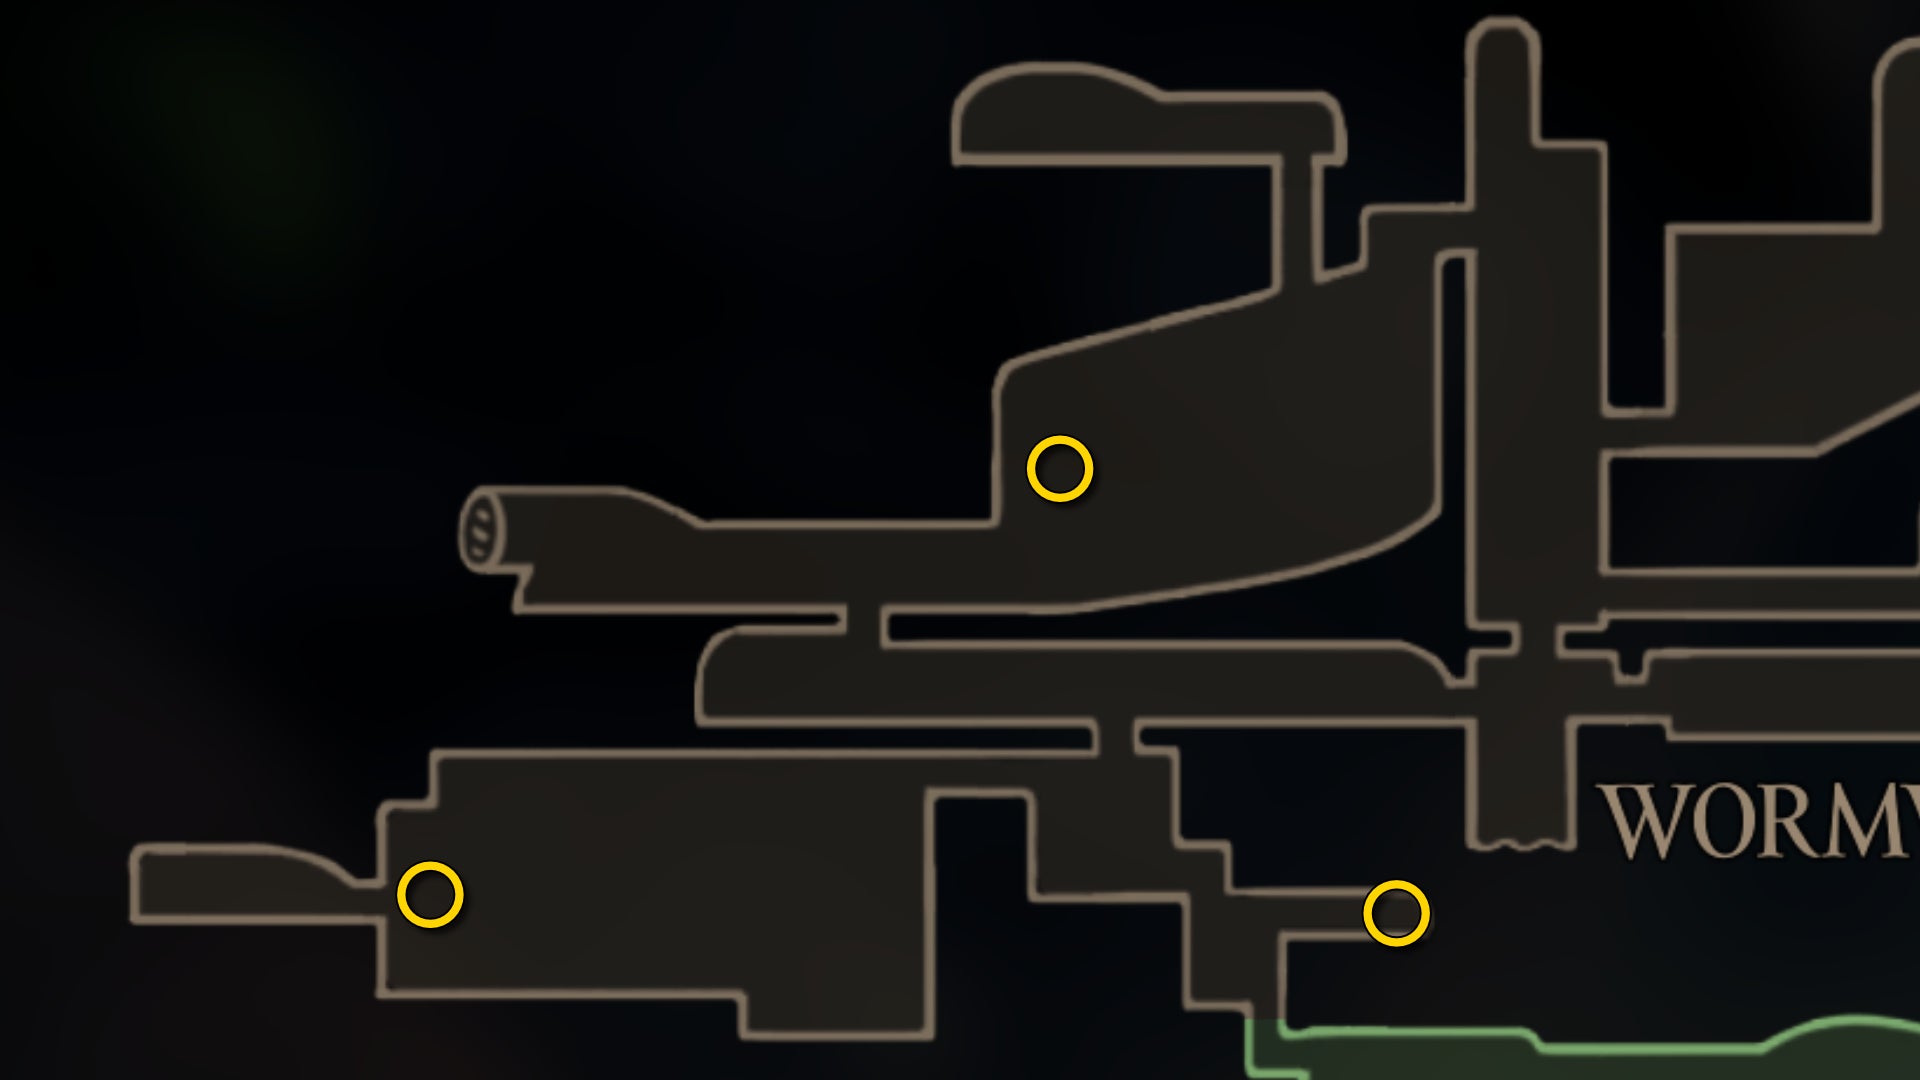
The first Plasmium is found in the room you're in at the moment. Head left, and climb the wall above the spike pit, then just follow the path to find the Plasmium orb. Walk up to the orb, activate your tool and keep it held to charge up the Needle Phial; then release it to extract the Plasmium.


The second Plasmium is the one you saw previously, which is on the way south to the Chapel Of The Wanderer. Head to it and suck out the Plasmium again with your Needle Phial.


The final Plasmium is in a new area of the Wormways you'll explore right now. Head back up to the top of the room of the second Plasmium, then head left and climb the wall past the Gromling. There are lots of Gromlings in this area, but take your time, heal off the Worms as needed, and explore the room fully to find and extract the third Plasmium.
Note: This room also contains a body in the sand at the end of one path, which you can loot for a valuable Memory Locket for expanding your Crests' tool slots.

11. Obtain the Plasmium Phial.
With the three Plasmium extracted, return to Zylotol, and he'll reward you with a very valuable prize: the Plasmium Phial. This Phial is equipped in your red tool slot, and allows you to expend a charge to give yourself a temporary extra point of Health.

You can only use it three times per rest, and also it has a maximum number of overall uses before you must return to Zylotol in the Wormways and pay him Rosaries to top it up for you. Still, it's a very useful item, particularly in the next section where you'll be facing one of the most challenging bosses in Act 1 of Silksong.
Well done; that was a lot of little tasks you just checked off the list. Now join us in Part 11 of our Silksong walkthrough to return to Hornet's main quest.
Read this next
- Ahead of Hollow Knight: Silksong's Sea of Sorrow expansion, Team Cherry have gotten their Traditional Chinese and German translation ducks in a row
- We may have glimpsed Silksong's Sea of Sorrow expansion in a six-year-old trailer
- Hollow Knight: Silksong's first big expansion, Sea of Sorrow, flows into our lives for free next year
