
Hollow Knight Silksong walkthrough: Part 11 (Bellhart)
Here's how to free the Haunted town of Bellhart


Wondering how to save Haunted Bellhart from its curse in Hollow Knight: Silksong? Previously in our walkthrough, we advised you to dip your toes into Bellhart just to rest at the Bench there. But in doing so, you'll have been met with a very eerie sight - dozens of Pilgrims, strung up by threads of silk, seemingly entranced and immobile. There's a powerful curse upon Bellhart, and it's up to you to save its inhabitants.
We'll tackle exactly this task in Part 11 of our Silksong walkthrough. We'll show you how to explore the upper and lower bellveins sandwiching the town of Bellhart, and the key points of interest you can find within. Finally, we'll show you how to sever those cursed ties upon Bellhart's people by defeating the powerful boss that is (seemingly) at the heart of it all.
Want the walkthrough for a different area of the game? Check out our Hollow Knight: Silksong walkthrough hub!
Bellhart walkthrough steps:
- Purchase the Mask Shard in Bone Bottom.
- Travel with the Flea Caravan.
- Rescue the Flea in the northern bellveins.
- Obtain Pollip Heart #6.
- Return to Greyroot.
- Enter the south bellveins and meet the Bell Hermit.
- Unlock the shortcut to The Marrow.
- Defeat Widow to unlock the Needolin.
- Speak to everyone in Bellhart.
- Obtain the Sharpened Needle from Plinney.
1. Purchase the Mask Shard in Bone Bottom.
If you haven't already done so, now is a great time to travel back to Bone Bottom and purchase the Mask Shard from Pebb, the trader. If you've followed along with our walkthrough so far, you'll already have collected four Mask Shards to upgrade your max health, but there's no time like the present to start working on your next Mask!

For reference if you missed any, the previous four Mask Shards are:
- Below the entrance to the Wormways.
- Above the Seamstress's home in Far Fields.
- Southeast of the Shellwood Bellway in the main shaft.
- Past the Gauntlet above the Deep Docks entrance.

2. Travel with the Flea Caravan.
The eagle-eyed among you may have noticed that if you've followed this playthrough, you've already found the five Lost Fleas required for Fleamaster Mooshka's quest. In fact, you've found seven of them! Yes, there are many more Fleas left to find in Silksong, but now is a good time to return to the Flea Caravan in the Marrow.

Speak with Mooshka, and he'll let you know that they're going to move on to higher grounds, and asks if you'd like to ride with them. Go ahead and accept - after a brief cutscene, you'll be transported to the Caravan's new home on the outskirts of Greymoor.
In fact, it's on exactly the other side of Bellhart from the way you entered it in the previous part of our walkthrough. Fancy that!

Speak with the various Fleas once you've arrived, and in particular, inspect the bubbling brew next to Grishkin to unlock a new consumable tool - Flea Brew! This goes in your weapon tool slot (the red slot), but it's a buff rather than a weapon, one which increases your movement and attack speed for a short time. You'll find it useful for the coming encounter(s).
3. Rescue the Flea in the northern bellveins.


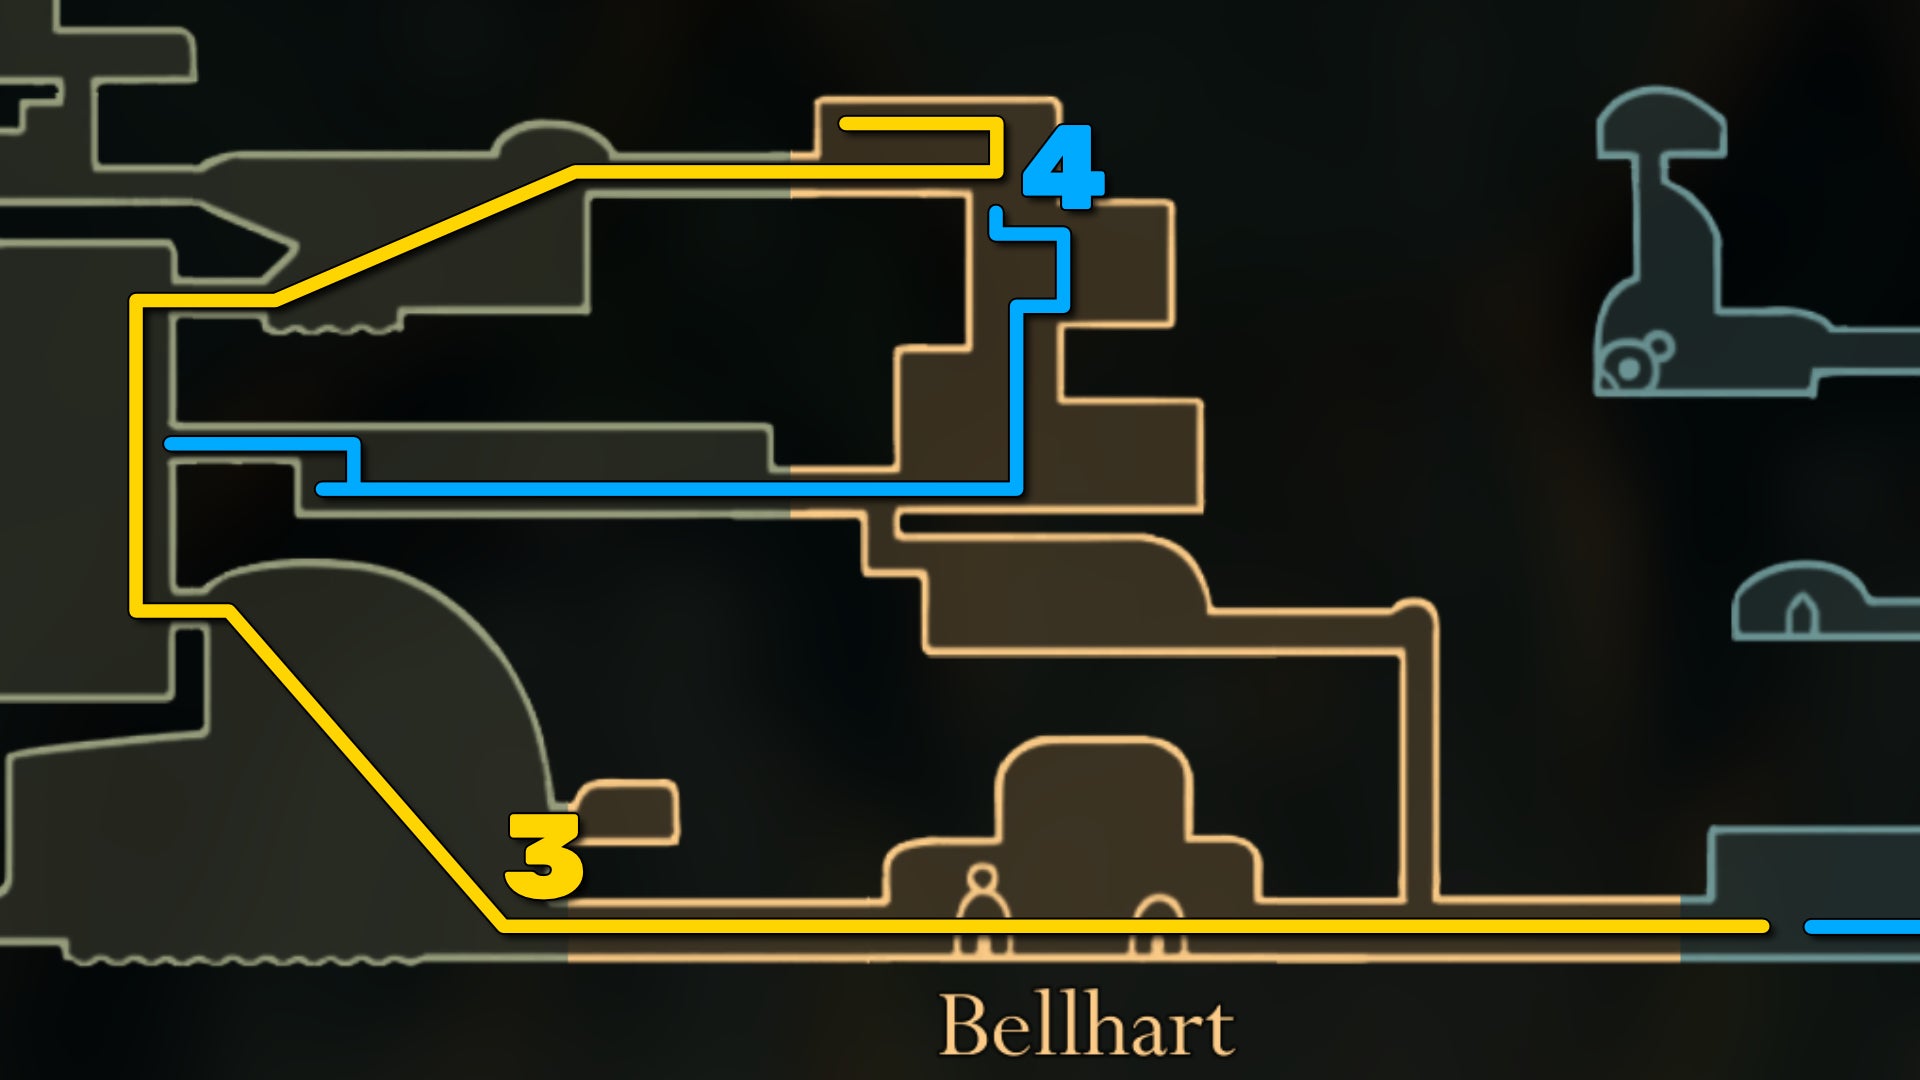
Head back into Shellwood, and make your way to the Bench with the elevator next to it. Ride the elevator to the top, and make your way to the very top-right of the next room. Smash through the wall of quivering bells to unlock an entrance to the bellveins above Bellhart.
In these dark tunnels you'll need to contend with bell-headed spider creatures called Furms, and larger winged variants which travel up and down set paths in the tunnels. Just slash at those big ones to kill them - they won't actively try to harm you.

After clearing the first Winged Furm, climb all the way to the top of its path, and jump across to the left where you'll find a trapped Flea you can rescue.

4. Obtain Pollip Heart #6.
Continue heading down the northern bellvein tunnels, shattering open new passageways as you go. At times you may need to time a slide down one of the walls patrolled by a Winged Furm; there's always an alcove you can duck into to avoid damage if you time your descent right.
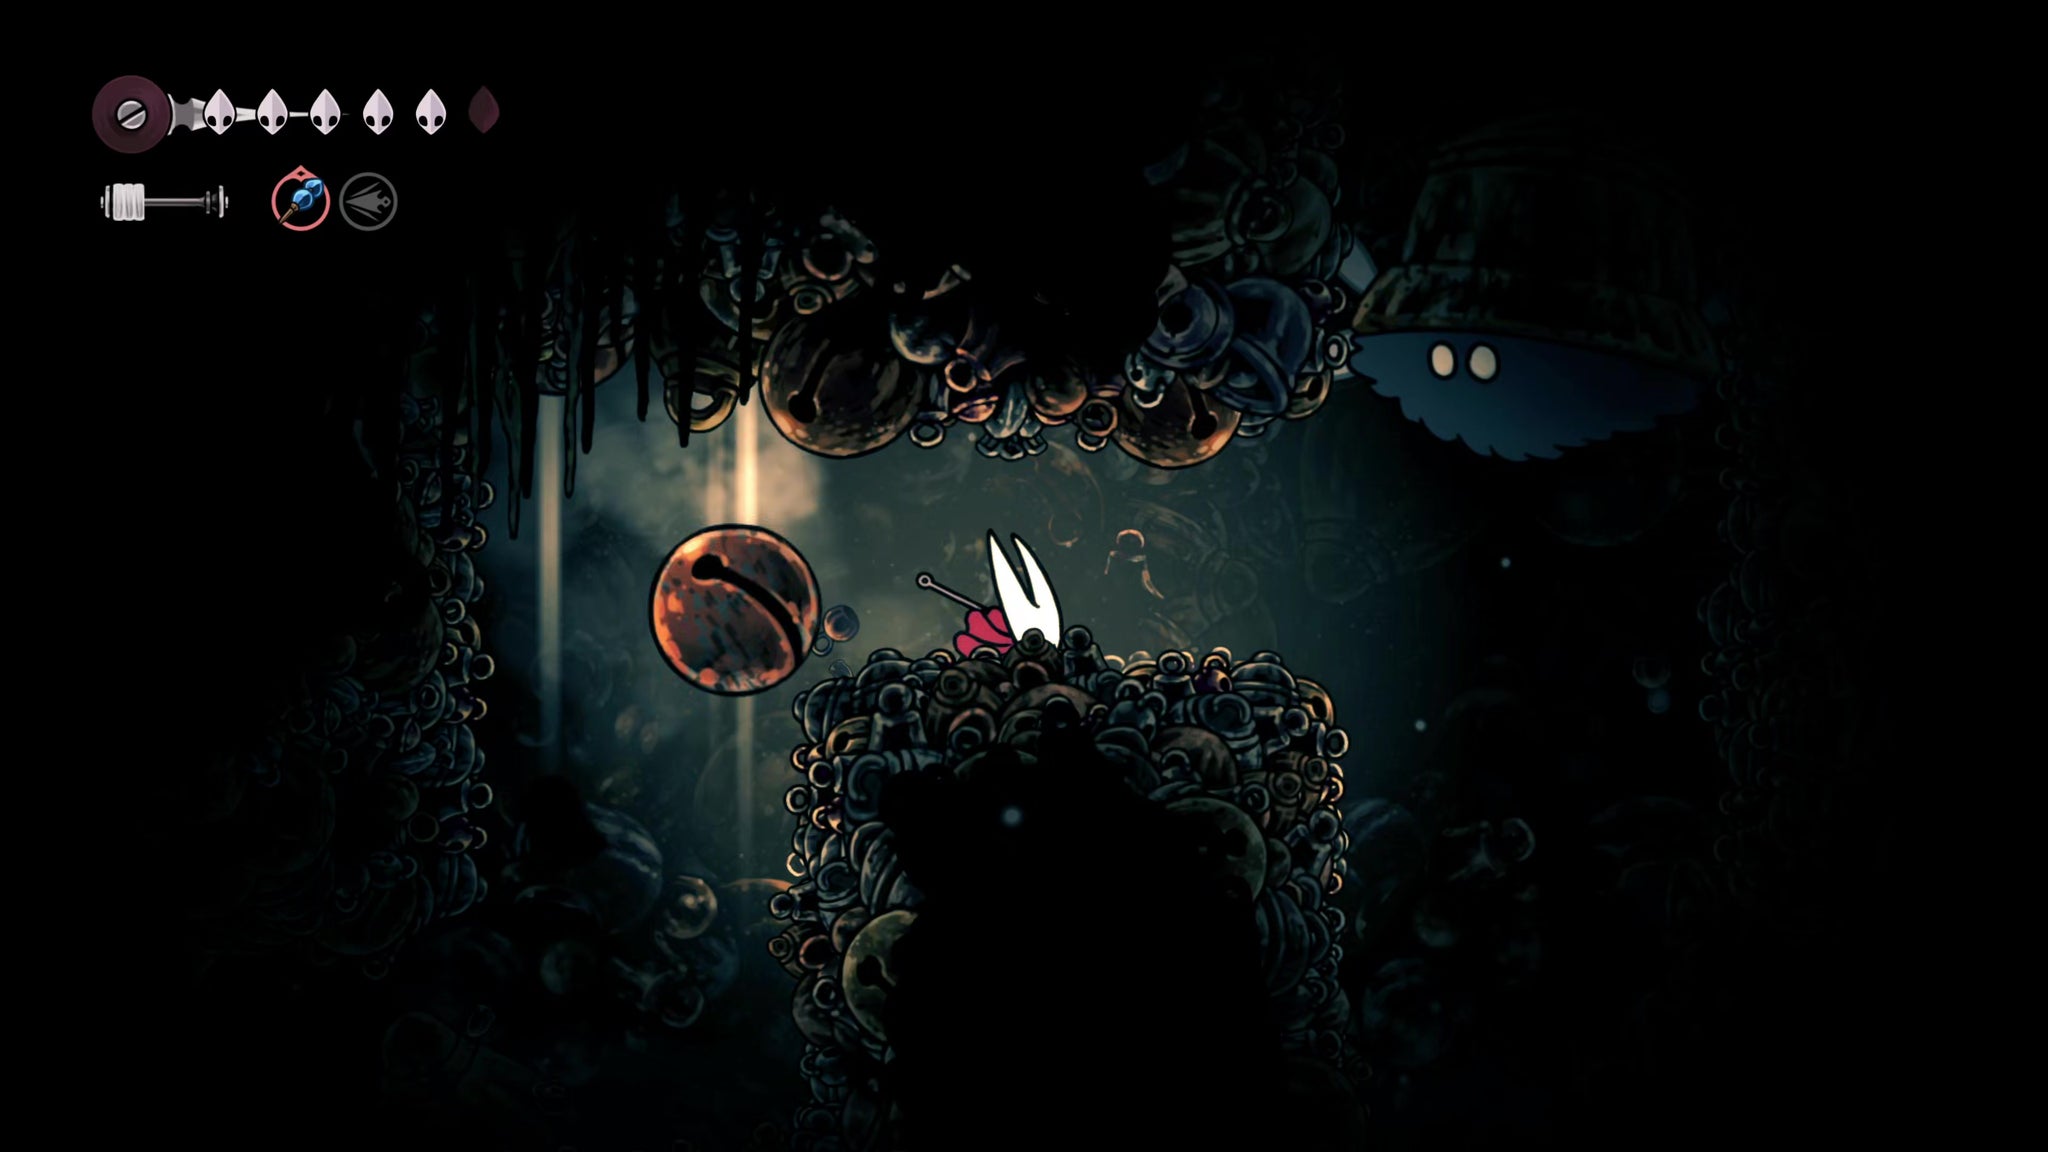
Soon you'll get to a drop with two large circular bells waiting to fall on you from above. Attack the bells to remove them, then drop down and destroy the left-hand wall for a path back into a new part of Shellwood.


At the far left side, you'll find some vines at ground level. Destroy them to reveal the final Pollip Heart for Greyroot's quest. Once you've destroyed the plant and gained the Heart, exit past the vines above you on the left, and you'll find your way back into the main part of Shellwood.

5. Return to Greyroot.
Now that you've collected all 6 Pollip Hearts, return to Greyroot in the centre of Shellwood. Turn in the Pollip Hearts to complete their quest, and they'll reward you with the Pollip Pouch - a blue-slot tool which applies venom (short damage-over-time effect) to all your equipped weapon-tools (such as your Longpin).
However, I'd recommend you keep something else equipped in that blue slot for now, because you should be using the Plasmium Phial in your weapon slot for the boss fight ahead.

6. Enter the south bellveins and meet the Bell Hermit.

Now, head back to the Bench in the centre of Bellhart, and rest there. Enter the building to the right, and you can unlock the Bellway there for 80 Rosaries. After that, turn around and head right, passing through the right-hand wall at ground level to reveal a passage down into the south bellveins below Bellhart.
Drop down to the bottom of the starting ledges, and head left to meet the Bell Hermit - a peculiar and none-too-friendly NPC. You can't really interact with him much at the moment, but remember him for later on.

7. Unlock the shortcut to The Marrow.
Spend a few minutes thoroughly exploring these tunnels, delving further south. As you descend further, be wary for sections of ground that crumble away to reveal spikes - so get ready to jump at a moment's notice.


Eventually you'll reach a section at the end of a left-hand path which is held up by a breakable wooden beam. Destroy the beam to open up a shortcut all the way back down into the top of The Marrow.

8. Defeat Widow to unlock the Needolin.


Now for the main event. Head back to the Shellwood Bench by the elevator and rest there, to provide an easy respawn point for the boss fight ahead. Then go back into the bellveins via the way you exited it (the path right next to the final Pollip Heart).
Head all the way to the right-hand side and drop into the hole. Follow the path down, and you'll drop into a boss arena, prompting a short exchange with a frightful Weaver foe called Widow. The exchange will quickly turn hostile, so prepare for a challenging fight.

Widow is a serious step up in difficulty from previous bosses you've faced. She moves very fast, so you can't punish her attacks very much; and if you don't know what to do at certain moments, you're guaranteed quite a bit of damage. DON'T be tempted to use your Plasmium Phial yet - save it for her final phase.
The obvious first step is to watch out for the strands of silk that show you the trajectory of incoming bell attacks. The diagonals are hardest; the bells will bounce at odd angles, so it's best to just run far away when you see them coming.


When Widow crawls along the ground and summons spikes, you need to run to the wall she disappeared at, and wall-climb up there (and possible float as well) to give yourself enough air-time to avoid the spikes.
Her other bread-and-butter attack is a diagonal-downward slash, followed quickly by a charge attack to the opposite end of the arena. Evade the first, and jump over the second. Don't try to get attacks in during this combo; she moves very fast, and you're liable to get yourself hurt instead.

When it appears that you've slain Widow, she'll disappear. But a moment later, she'll come back for a ferocious final phase, during which she sends huge numbers of bells at you while performing all her other attacks. In that window before she returns, expend your Plasmium Phial entirely to give yourself three temporary hit points - you'll need them.
Even with the extra health, this phase is challenging; try to keep Widow on one side of the arena and yourself on the other, to give yourself the maximum amount of manoeuvring space. Hit her as much as you can without sacrificing your safety, and eventually you'll take her down.

Once Widow is slain, you'll bind a new skill: the Needolin. This lovely new ability allows you to play music with your needle, which among other things, allows you to open up certain passageways into new areas.


Make your way up the silk-world platforms (which this time includes some wall-climbing elements), and play your Needolin when instructed to open the doorway at the end. At the end of the path, pick up the item on the ground to reappear in Pharloom once again.
9. Speak to everyone in Bellhart.


Once you reawaken, rest at the Bench in the arena. Use the left-hand path to open up a shortcut back to the tunnels above, then double back and head to the right for a shortcut back down into Bellhart itself.

Happily, the silken curse over the town has now been broken, and life has been restored (mostly). Spend some time speaking to the inhabitants of Bellhart, and also take a look at the Wishwall and accept all the quests that have appeared there.
You can also reach the upper levels via the ledges to the left, where you can speak with Relic Seeker Scrounge and turn in the lore items you've found so far for - you guessed it - some lore.
10. Obtain the Sharpened Needle from Plinney.

The final step of this section is to speak with Pinmaster Plinney, to the right of Scrounge's home in the upper levels of Bellhart. He's in his own home, and when you speak with him, he'll offer his thanks in the form of a weapon upgrade, transforming your base needle into the higher-damage Sharpened Needle.
Speak with Plinney again after that, and you can accept his quest to find some Oil from within the Citadel, which will allow him to improve your weapon's damage even further.
Congrats! You've defeated the powerful Widow, and reached the end of Part 11 of our Silksong walkthrough. What's next? Part 12, of course!
Read this next
- Ahead of Hollow Knight: Silksong's Sea of Sorrow expansion, Team Cherry have gotten their Traditional Chinese and German translation ducks in a row
- We may have glimpsed Silksong's Sea of Sorrow expansion in a six-year-old trailer
- Hollow Knight: Silksong's first big expansion, Sea of Sorrow, flows into our lives for free next year
