
Hollow Knight Silksong walkthrough: Part 28 (Sands Of Karak)
Here's how to reach and navigate the perilous Sands Of Karak


Not quite sure where to go in the Sands Of Karak region of Hollow Knight: Silksong? The Sands Of Karak have actually been traversable ever since Part 19, when we got access to the Clawline harpoon. But it's one of the trickier regions in Silksong, despite its relative lack of enemies - and there are a few reasons why it's a good idea to leave it until Hornet is a little bit more experienced.
But now, it's time to brave those Sands. In Part 28 of our Silksong walkthrough, I'll show you how to reach the Sands Of Karak from the Blasted Steps, how to open up every secret passage and shortcut along the way, and how to defeat the two major bosses of this area.
Want the walkthrough for a different area of the game? Check out our Hollow Knight: Silksong walkthrough hub!
Sands Of Karak walkthrough steps:
- Enter Sands Of Karak via the Blasted Steps.
- Obtain the Memory Locket above.
- Meet Shakra and buy the Sands Of Karak map.
- Open the shortcut to the Blasted Steps Bellway.
- Obtain the Crustnut for the Gourmand.
- Rescue the Lost Flea.
- Obtain the final Simple Key.
- Open the shortcut beyond the parkour course.
- Defeat the Voltvyrm.
- Defeat the Raging Conchfly.
- Enter the Coral Tower for the Conchcutter.

1. Enter Sands Of Karak via the Blasted Steps.
The only way to reach the Sands Of Karak is via the Blasted Steps, so fast travel to the Blasted Steps Bellway when you're ready to begin. Then head right, down the hole, and take the left-hand path that leads past the Great Conchflies arena and to the Pinstress's balloon-house to the far west. Once you're there, enter the Pinstress's house and rest at the Bench there.
Outside the house, clawline onto the hook to your left, and from there follow the path of hooks to the pillar; then jump far to the right and you'll reach an upper ledge above the Pinstress's house.

Climb up the wall to your right and follow a continued path of clawline hooks up into the room above - the first room of the Sands Of Karak.
Climb the wall above the spikes on your left, and from there just keep climbing and bouncing between walls, minding the occasional Pharlid on the wall. At the very top there's an upper ledge where you can read some lore. After that, take the exit on your right to reach the proper part of the Sands Of Karak for the first time.
2. Obtain the Memory Locket above.


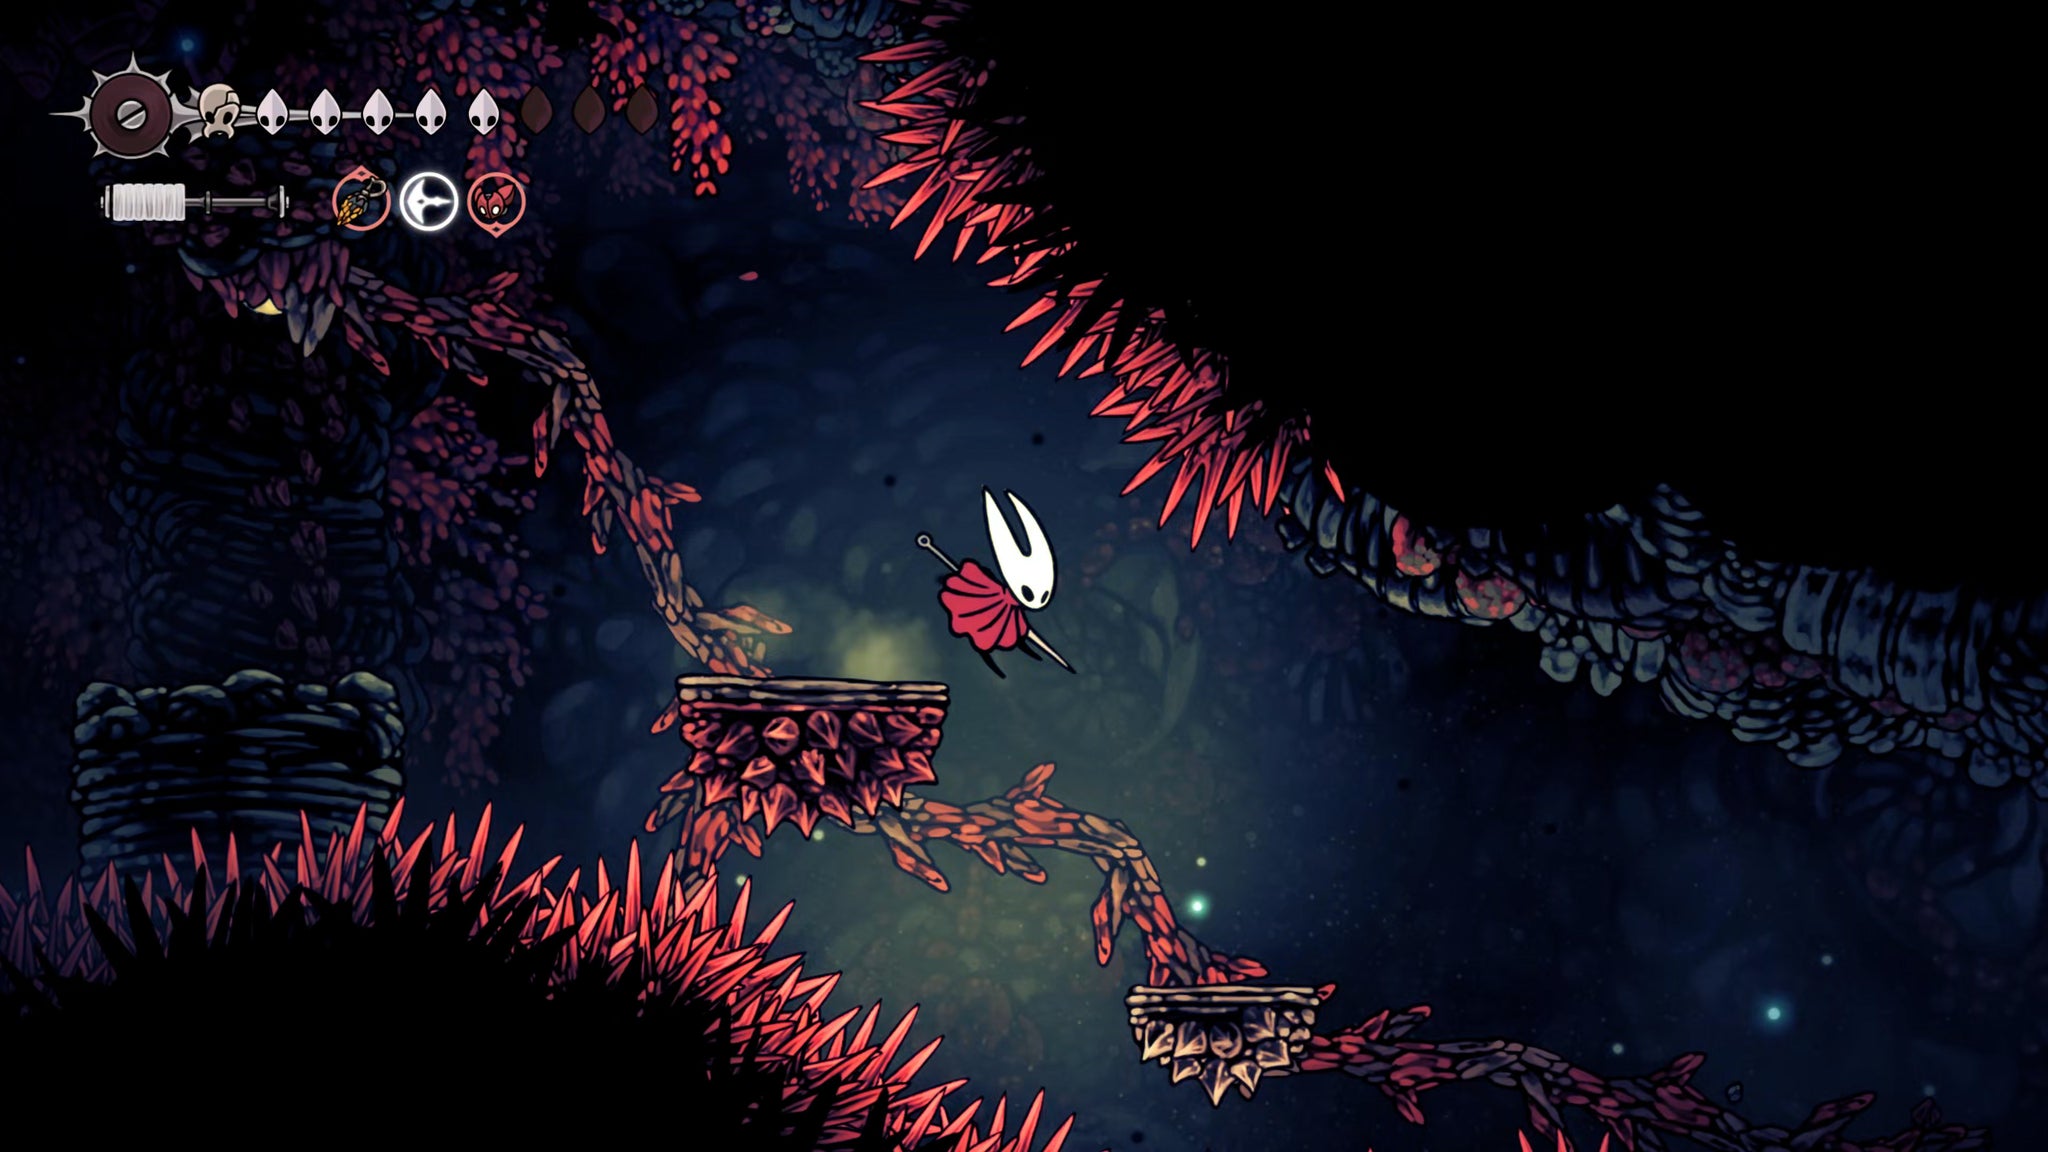
The Sands Of Karak has a unique traversal mechanic. Whenever you see a yellow orb on a surface, you can break it to conjure a path of temporary floors, walls, and Pogo-able spiky objects. You can use these to get to the next proper platform, as long as you hurry - the temporary surfaces will crumble quickly.
Use the first orb to get across to the next platform, and kill the tortoise-like Coral Furm enemy there. Then use the second orb to get to the middle of the room.


Here, when you break the third orb, it will sprout two paths - one left and one right. Take the left-hand path, and it will take you up to the ceiling where you can break another orb to continue the path. At the end of the path, jump to the left-hand ledge to loot a Memory Locket from a pilgrim's body.
Be aware that as you jump over to this ledge, a Driznarga (bigger and tougher than the Driznits of the Blasted Steps) will spawn and attack you. Kill it carefully, and then use the nearby orb to make your way back onto the main path.

3. Meet Shakra and buy the Sands Of Karak map.

Continue using the orbs to reach the far side of the room. When you see two rows of spikes to your right, clawline between them and climb up to reach another orb; then follow it back down and then up to the right to reach the next room.
In this room, climb up to the left-hand exit above you, and you'll find some golden rings on the floor - evidence of Shakra's proximity. Head through the room to your left and you'll quickly find her beyond the pit of spikes. Exhaust her dialogue, and purchase the Sands Of Karak map from her for 90 Rosaries.


4. Open the shortcut to the Blasted Steps Bellway.
Head back into the previous room, and climb just a little higher. You'll see a large red stalactite hanging down from a ledge of spikes. Attack the stalactite from the wall and it'll drop all the way down to the bottom of the room, creating a hole in the floor.

Drop down to the floor and delve down the hole it made. Surprise, you're back in the Blasted Steps! This is a really handy shortcut, because you can descend to the bottom-right exit to find the Blasted Steps Bellway and rest at the Bench there before you head back up. Far better than dying and respawning back at the Pinstress's house!
5. Obtain the Crustnut for the Gourmand.
Climb back up to where you dislodged the stalactite, and then climb a little higher, to the two small ledges above. From the upper ledge, attack the spiky wall to the upper-left to reveal a secret room.

This room isn't very dangerous, but it is very irritating. It's essentially a winding maze-like path filled with more spiky breakable walls, floors, and ceilings obfuscating the path. Take your time to avoid silly damage, and make your way to the far-left end of the room.

Along the way, there are several sets of red spikes, both above and below you, which you'll need to clawline your way past. After the third one, don't bother going downwards - it leads to nothing. Just head straight across to the left, and below the fourth set of red spikes you can break through more walls to finally reach the reward at the end of this room: the Crustnut.

In case you weren't aware, the Crustnut is one of the four items that you need in order to complete the Great Taste Of Pharloom sidequest, and receive the next supply of Pale Oil from Loyal Mergwin's stash in the Choral Chambers. Pale Oil is what you need to improve your weapon damage, so this reward is well worth the hassle of getting through this room.
Backtrack out into the previous room once you have the Crustnut.
6. Rescue the Lost Flea.
Back in the main shaft (with the stalactite), you'll find if you go upwards that the way up is blocked. Therefore, drop down to the very bottom (though don't overshoot and land in the Blasted Steps!). On the right is a breakable wall, through which is the path to follow next.
Hit the first yellow orb to find your way across to the next platform, where you'll need to carefully kill another Driznarga. Then hit the second orb, and follow the right-hand path across and kill the Coral Furm there.

A little further across the platforms to your right, you'll see an upper ledge with a breakable wall. Break through it to the far end of the ledge, and leap over to the piece of rock jutting out from the ceiling. Hit the orb next to you while still clinging onto the rock.
This next movement is slightly tricky. Wait on the wall until the orb's path reveals its first spiky orb to the lower-left of the rock you're clinging onto. The moment it appears, slide off the bottom of the rock and immediately clawline to the spiky orb, and follow the path left from there.

At the end of the path you'll reach the left-hand wall, just below some spikes. Climb upwards from there and at the top you'll find one of the few remaining Fleas in Silksong, stuck in some more spiky breakable wall. Attack to free the Flea, and then drop down back onto the main path and continue right until you reach the next room.

7. Obtain the final Simple Key.
In this next room, jump over to the ledge on your right, break the wall there, and exit through the doorway. Immediately in front of you, you'll find an elevator cage like the ones you saw way back in Shellwood. Press the pressure plate to activate it, and ride it down to the bottom.


At the bottom, attack the breakable spikes in the ceiling ahead of you and it'll drop a Coral Furm on your head that you'll need to deal with. After that, drop down the hole to the lower room and break the wall there for another shortcut into Blasted Steps - this time just above the Last Judge room.
Now go back to the elevator, jump onto the top of it, and climb partway up the wall until you find the ledge on your right. You can break the wall here for a little cave section with a bunch of Shell Shard rocks. One of the rocks, however, is a Shardillard which awakens when attacked, so be a little careful here.

Now take the elevator back up to the top, and head to the right. A little further on you'll be ambushed by two Conchflies - mini versions of the Great Conchflies you faced off against in the Blasted Steps. A well-placed couple of Sharpdarts will make quick work of them, but you can also just run right past them.
At the end of the path, hit the breakable wall and you'll find the room at the far eastern edge of the Sands Of Karak. There's a Bench here you can rest at, and you can also loot the poor pilgrim sitting on the Bench for the fourth and final Simple Key in Silksong. We'll use it in the next part of the walkthrough!

8. Open the shortcut beyond the parkour course.

Head back to the left, past the elevator, and exit into the previous room. You need to go upwards, but to do that, you first need to drop to the very bottom of this shaft. Drop carefully; the way is guarded by a couple of flying Pokenabbins (great name), and near the bottom you need to veer to the right to avoid the spikes.
At the bottom, hit the orb to create a path which leads all the way to the top of the shaft. You'll need to climb quickly, because it will crumble fast. Once you're at the top, exit into the corridor to your left.

In this next room, you can immediately jump onto the wall in front of you and keep climbing upwards through the ceiling. This reveals a tiny secret room with a couple of cobwebs you can destroy for Silk. Then drop down to the bottom.
The next section is a long and fiddly parkour course, where you often need to hit the yellow orbs while already navigating the path set by a previous orb. Once you get to the large section of rock protruding from the ceiling, you need to employ that same trick as before, where you wait for the path beyond to reveal itself, then slide off the bottom and clawline onto the path to continue.


Once you reach the next room, climb up the right-hand wall and you'll find another giant red stalactite to knock down. Make sure you do this - we want to unlock a shortcut up here so you don't have to do that parkour course again.
Once you knock down the stalactite, drop down through the hole it makes in the floor, and head to the very bottom - then drop further down into Blasted Steps and rest once again at the Bellway. This is by far the best respawn point for the boss fights that follow.
9. Defeat the Voltvyrm.


Climb all the way back up to the second stalactite just beyond the parkour course. Climb up the wall again, and then jump and clawline over to the top-most part of the right-hand wall opposite. Then keep climbing up through the ceiling to reveal a secret passageway which leads to an ominously glowing purple cave called the Voltnest.
This cave is one of just two places in all of Silksong where you'll find electricity-based flora and fauna. Head to the right, and you'll soon start to see the periodic electricity traps that go off, forcing you to time your dashes and climbs.

Keep following the path until you have to drop downwards, and then take the left-hand path. You'll soon reach an arena where you must face off against the cave's boss: the Voltvyrm.
The Voltvyrm is actually a very easy fight. You're only ever having to attack upwards to hit the Voltvyrm peering out at you from the ceiling, which simplifies things greatly. It only has two attack types - one where it fills the room with electricity orbs, and another where it fills the room with electricity columns
There's really not much to master here except quickly dashing out of the way of attacks, and otherwise being as aggressive as possible. With the Flintslate, it will take you very little time to kill the Voltvyrm.


Once the Voltvyrm is dead, it will drop an item floating down to the ground; loot it for Volt Filament - a powerful tool which enhances all your Silk skills with electricity, increasing its damage and adding a stun effect.
To get out of the Voltnest, head to the right. At the end of the path you can inspect an outcrop of Voltridian - it has no value except for adding the resource to your Materium - a completionist encyclopaedia you'll unlock a little later on.


Then take the upward path just before the Voltridian, and it will take you back to near the start of the Voltnest. From there you can retract your steps back outside. There's another (in my opinion, harder) boss fight up next, so if you need to, now's a good time to drop back down to the Blasted Steps Bellway and rest again.
10. Defeat the Raging Conchfly.

Make your way back to the top of the shaft just below the entrance to the Voltnest, and exit into the room to the left. Hop across the platforms in the next room, defeating or ignoring the Driznarga on the way. At the end of the path is another arena.
This time, you'll be blocked by the reappearance of a very aggressive old foe: the one remaining Great Conchfly - now crazed and extra-aggressive at the loss of its partner.

The Raging Conchfly is considerably faster than it was before, and likes to shoot horizontally across the room, as well as conjuring smaller Conchflies to shoot across the room at different intervals. When this happens, you need to watch to see which of the three Conchflies passes you by first, and then jump into the same height level as that first Conchflies to avoid the other two.


The real difficulty of this fight is quite simply the tempo. The Raging Conchfly moves so quickly that it can at times be hard to avoiding its repeated attacks from different directions, because Hornet is still in the recovery animation of her previous dodge.
Tacks are fairly useless in this fight, so I like to take the Sting Shard and litter the arena with it for extra damage. I'd also encourage you to make liberal use of your Flintslate, and don't worry about wasting it - just get in any hits you can while it's active. The good thing is that the Raging Conchfly doesn't have a tonne of health, so you should be able to burst it down fairly quickly after you get into the rhythm of dodging and weaving past every attack.
11. Enter the Coral Tower for the Conchcutter.

Once the Raging Conchfly is finally defeated, exit to the left and you'll find the entrance to the Coral Tower, the very top-left-most point of the Sands Of Karak.
This area becomes more important in Act 3, but for now you can just head into it for some lore, the item on the floor (the Conchcutter), and a hidden Bench at the very end of the path.
And with that, you've conquered the entirety of the Sands Of Karak. Near enough. We'll get to those last little bits later on in Act 3.
Congratulations on braving the winds and wildness of the Sands Of Karak; there are few environments harsher in Silksong. Join us in Part 29 of our Hollow Knight: Silksong walkthrough, as we return to Hornet's main quest for the final part of the Threefold Song.
Read this next
- Ahead of Hollow Knight: Silksong's Sea of Sorrow expansion, Team Cherry have gotten their Traditional Chinese and German translation ducks in a row
- We may have glimpsed Silksong's Sea of Sorrow expansion in a six-year-old trailer
- Hollow Knight: Silksong's first big expansion, Sea of Sorrow, flows into our lives for free next year
